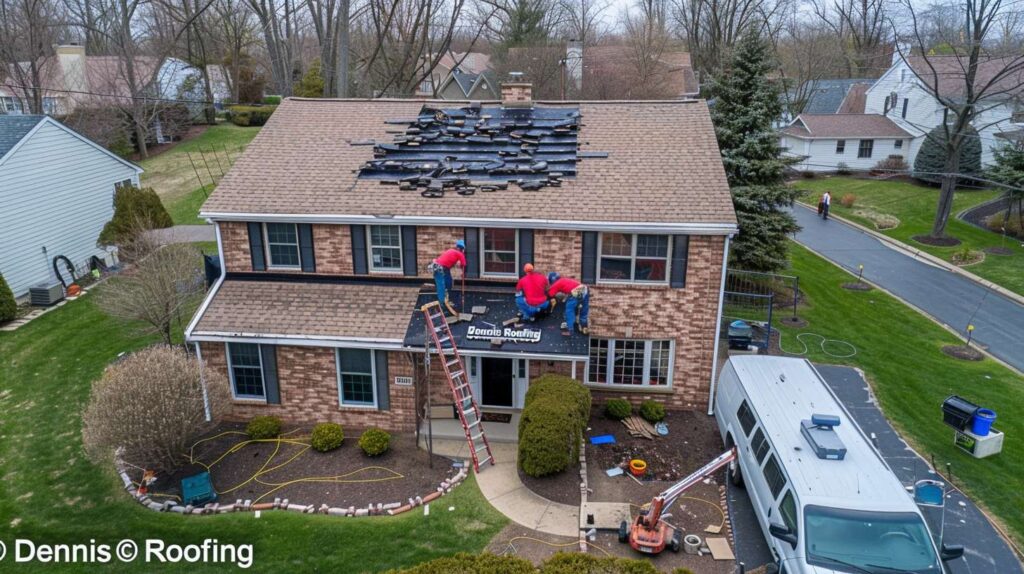
Remsen Village’s Residential Roots Run Deep – Let’s Keep the Roofs That Way Too
Trust what you see on the ceiling just enough to know something’s wrong – but not enough to know where the problem actually is. On older residential roofing in Remsen Village, the place where damage shows up and the place where the roof actually failed are often twelve feet apart, sometimes more, and the space between those two points is where most bad repair decisions get made.
Where the Leak Shows Up Is Rarely Where It Started
On a Remsen Village roof, the first thing I look at is where the water is trying to sneak off to. Older Brooklyn homes – row houses, brick two-families, the wide flat-topped colonials near Flatbush Avenue – were built with materials that have been patched, re-patched, and tarred over for decades. Water doesn’t fall straight down through all of that. It enters at one point, rides along a seam or a flashing edge, travels under a layer of old modified bitumen roofing or pooled beneath dried-out membrane, and then exits through the path of least resistance. That exit is what you see. The entry point is something else entirely, usually something quieter and further away.
A ceiling stain is a lousy witness. I remember standing on a Remsen Village row house roof at 6:40 in the morning in late March, the kind of cold where your gloves feel damp before the work even starts, and the homeowner kept insisting the leak had to be above the bedroom window. It wasn’t. Water had gotten in near the chimney flashing repair area, traveled under two old layers of modified bitumen roofing, and showed up twelve feet away. That job is still the one I think about when someone points at a ceiling stain like it’s the crime scene. Danny Kowalski – 17 years in roofing, the last several focused specifically on tracing stubborn leak paths through older residential roofs – would tell you plainly: trying to diagnose a leak from interior damage alone is one of the costliest mistakes a homeowner can make. You end up patching the wrong spot, the water keeps moving, and you pay twice.
| Common Assumption | What Danny Actually Looks For |
|---|---|
| The ceiling stain marks the exact leak source | Water travels horizontally along decking, old patch layers, and rafter lines before it drips. The stain is the exit, not the entry. A roof inspection traces the path backward from the stain to find the real breach. |
| Flat roofs only leak where water is visibly ponding | Ponding is a drainage problem, but flat roof leaks commonly start at parapet edges, seam separations, and around EPDM or TPO membrane terminations – areas that look dry until they’re not. |
| Chimney leaks always mean masonry damage | Chimney flashing repair is the more likely culprit. Step flashing, counter flashing, and the saddle behind the chimney all fail before masonry does – especially on older Brooklyn homes where original flashing was never replaced. |
| One patch will solve a recurring leak | If the same area has been patched before, the system around that spot is usually compromised. Roof leak detection that stops at the surface patch misses the softened decking and layered moisture underneath, which eventually costs more to fix. |
| If shingles look fine from the street, the roof is fine | Asphalt shingle roofing can look intact from ground level while the underlayment is failing, granule loss is advanced in non-visible sections, and flashing around the ridge or valley has already separated. A roof inspection is the only real answer. |
Residential Roofing Realities in Remsen Village
- Common Trouble Spots: Chimneys, skylights, parapet edges, and gutter lines – these are where systems meet and where failures begin on older Brooklyn homes.
- Most Misleading Symptom: Ceiling stain – its location tells you water escaped there, not where it got in.
- Frequent Roof Types Locally: Flat roofing (EPDM, TPO, modified bitumen) and asphalt shingle roofing – often both on the same structure.
- Best First Step: Roof inspection before committing to repair or replacement – you need the full travel path before you pick a fix.
Sorting Repair From Replacement Without Playing Guesswork
When a repair still makes sense
Here’s the blunt version: roof repair makes sense when the damage is isolated, the system holding it has life left, and water hasn’t been sitting underneath long enough to soften the decking. But in Remsen Village, that “isolated damage” assumption gets complicated fast. A lot of these homes – the row houses off Flatbush, the brick duplexes tucked behind Canarsie Road – carry decades of layered repairs. Flat roof sections with three generations of patching. Chimney transitions that have been caulked, flashed, re-caulked, and wrapped in rubberized membrane by four different contractors. Skylight curbs that never sat quite right. When you find a problem in one of those systems, the surrounding materials rarely tell a clean story. Roof replacement becomes the smarter call when multiple materials are compromised, the decking is soft, leaks have recurred in the same zone, or the overall age and fatigue level of the system outpaces what a targeted fix can reasonably hold together.
When the roof has run out of second chances
I’ve stood on enough patched-up flat roofs at sunrise to know this much: there’s a point where a roof stops failing in one place and just starts failing. One August afternoon, right after one of those heavy Brooklyn thunderbursts that hits hard and leaves steam coming off the sidewalks, I met a retired bus driver who had a tarp flapping over half his flat roof. He thought he needed emergency roof repair only – just seal the section, stop the drip. But once we peeled things back, we found soft decking around an old skylight repair area and three different patch materials that were practically pushing against each other: old tar and gravel roof remnants, a rubber roof section applied later, and a strip of modified bitumen roofing someone had laid over both. That’s what it looked like from the street – a tarp situation – but here’s what was actually happening: the roof hadn’t failed in one spot. It had just finally run out of ways to hide how tired the whole system was. That homeowner needed roof replacement, not another patch. The cost of a real fix would’ve been lower a year earlier.
| Situation | Likely Best Service | Why It Fits | Typical Urgency |
|---|---|---|---|
| Single area dripping after rain, no prior repairs in that zone | Roof Leak Repair | Isolated damage on a system that’s otherwise holding – repair after inspection to confirm scope | Moderate – schedule within days |
| Water entry near chimney, no masonry cracking visible | Chimney Flashing Repair | Step and counter flashing are the most common failure points at chimney bases; masonry is usually secondary | Moderate to High |
| Dripping or condensation at skylight frame, curb looks intact | Skylight Repair | Curb flashing and sealant failures account for most skylight leaks before the unit itself is the problem | Moderate |
| One section of flat roof compromised, rest of membrane sound | Partial Flat Roof Installation | Applies when the surrounding TPO, EPDM, or modified bitumen roofing is in serviceable condition and properly bonded | Moderate |
| Multiple leak zones, soft decking, recurring patch failures, or age-related system fatigue – residential or light commercial roofing | Full Roof Replacement | Continuing to repair a system past its threshold costs more over time; new roof installation resets the baseline | High – don’t delay |
| Active leak, blown membrane, or exposed decking after storm – residential or commercial roof | Emergency Roof Repair | Immediate weather protection needed; emergency service contains damage, followed by full assessment for storm damage repair or replacement scope | Urgent – call same day |
Decision Tree: Repair, Replacement, or Inspection First?
Is this the first time you’ve seen a leak in this area?
YES → Is there visible storm damage, a puncture, or obvious flashing failure?
YES → Likely a targeted repair after inspection to confirm the travel path
NO → Inspection first – no cause visible, so the entry point is somewhere else
NO → Has this same area been patched before?
YES → Evaluate for replacement – system is showing recurring failure
NO → Is the decking soft, bubbling, or sagging in that section?
YES → Replacement likely – structural integrity of decking is compromised
NO → Targeted repair may work – get the scope confirmed first
Not sure where water entered? → Inspection before any commitment. Guessing skips the one step that saves money.
Reading the Roof System Instead of One Symptom
If you were standing next to me at the ladder, I’d ask you one question first: are you trying to stop today’s leak, extend this roof’s useful life, or avoid a bigger surprise six months from now? And honestly, that’s not a casual question – the answer changes the entire inspection focus. A short-term stop means I’m chasing the active water path and sealing the breach. A life-extension fix means I’m checking membrane adhesion, flashing integration, and drainage. A full system review means I’m looking at decking condition, layered repair history, and whether roof replacement is the smarter investment. Same roof, three different inspection priorities.
What Gets Checked on a Remsen Village Roof Inspection
- ✓ Membrane seams – separation, bubbling, or open laps on flat roof surfaces
- ✓ Shingle field wear – granule loss, lifting edges, and cracked tabs in asphalt shingle roofing
- ✓ Chimney flashing – step flashing integration, counter flashing seating, and saddle condition
- ✓ Skylight curbs – flashing, sealant integrity, and frame-to-membrane transition
- ✓ Parapet edges – coping cap condition, flashing termination, and any separation at wall transitions
- ✓ Gutter pitch and attachment – whether drainage is pulling water away from the fascia or letting it sit
- ✓ Fascia condition – rot, separation, or paint failure that signals long-term water contact behind the gutter line
- ✓ Trapped moisture under prior repairs – soft spots, delamination, and signs of sealed-in damage beneath old patch layers
Why Roof Type Matters More Than Most People Think
Flat Roofing – TPO, EPDM, Modified Bitumen, Tar and Gravel
Water typically enters at seam separations, around penetrations, or at edge terminations. On older EPDM roofing and tar and gravel roof systems, it travels beneath the membrane before showing up inside. Inspections on flat roofing need to focus on seam integrity, drain condition, and whether any previous patches have created moisture pockets underneath. TPO roofing and modified bitumen roofing add complexity when layers from different eras are stacked.
Asphalt Shingle Roofing
Water most often enters at valley flashing, ridge vents, or where shingles meet a vertical wall. From there it moves along the underlayment, which on older Remsen Village homes may be felt paper that’s cracked and brittle. Granule loss accelerates this. Inspections need to go beyond the shingle surface – the condition of valleys, penetration flashings, and the underlayment underneath are where the real story is told.
Metal Roofing
Metal roofing fails at fasteners first – screws back out or washers fail and let water wick in along the shaft. Panel seam uplift from thermal movement is the other common entry point. Once inside, water travels the full panel length before dripping. Inspections on metal roof systems need to cover every penetration, every fastener line, and the perimeter transitions where metal meets a different material.
Rubber Roof Systems – EPDM and Similar Single-Ply Membranes
A rubber roof is durable when installed correctly, but shrinkage over time pulls flashings away from walls and curbs. That gap at the base of a parapet wall or skylight curb is one of the quietest, most consistent entry points on a Remsen Village flat roof. EPDM roofing inspections should specifically check flashing adhesion at every termination point and look for any hardening or cracking at seam edges.
⚠ Before You Patch – Read This
Applying roof sealing, roof coating, or a quick patch over wet or failing materials can trap moisture inside the system. Sealed-in moisture accelerates decking rot, breaks down membrane adhesion from underneath, and makes a future roof replacement significantly more expensive. Roof waterproofing works – but only when it’s applied to a dry, sound surface that’s been properly inspected first.
After Storms, the Fastest Answer Is Not Always the Smartest One
What counts as urgent today
Think of your roof like a bad shortcut through Brooklyn – water will take it every time. After a storm, the question isn’t whether something got compromised; it’s how quickly water found a route and how far it’s traveled. Wind damage repair and storm damage repair become emergency roof repair territory when you’ve got active water entry during rain, exposed decking, uplifted membrane sections, or – and this is the one people underestimate – water running anywhere near an electrical fixture. Those situations don’t wait. Sagging ceiling sections and large flashing displacement after wind events also go in the urgent column. The roof’s job was interrupted, and the interior of the house starts the clock the moment it happens.
What can wait for a scheduled visit
A few winters back, I was doing a roof inspection for a family that had just bought a brick house from the 1940s – the kind of solid Remsen Village construction you still find on the residential blocks off Remsen Avenue – and the grandfather followed me outside in house slippers while sleet was starting to come down. He kept saying, “This house has good bones,” and honestly, he was right. But the asphalt shingle roofing had been replaced badly over rotted fascia, and the gutter installation pitched the wrong way, sending drainage back toward the house instead of away from it. That’s what it looked like on a casual walk-by – a fine older home – but here’s what was actually happening: every time it rained hard, water was loading up along the roofline edge, the fascia had been softening for years, and the drainage error was turning weather events into interior moisture problems. A strong house still needs a roof system that respects it. Gutter repair and edge detail work aren’t glamorous, but they’re exactly what keeps a good-bones house from becoming a water damage claim.
📞 Call Now
- Active leak during rainfall
- Visible ceiling sagging or soft spots
- Membrane blown open or torn
- Large flashing section displaced by wind
- Tree limb impact on roofing surface
- Water visible near electrical fixtures
📅 Schedule Soon
- Isolated granule loss with no active leak
- Cosmetic ceiling stain that’s already dry
- Minor gutter drip with no overflow or fascia damage
- Routine roof cleaning request
- Planning a new roof installation for next season
Before You Call a Roofer After a Storm – Note These 7 Things
- When the leak first appeared – during the storm, hours later, or the next morning
- Whether it only happens in wind-driven rain or occurs with any rainfall
- Photos of the ceiling area and any exterior damage you can take safely from ground level
- Whether there have been prior repairs in the same area – and roughly when
- Whether a skylight, chimney, or gutter line is near the problem area
- Whether a tarp has already been installed and who placed it
- Whether you think insurance claim roofing may be involved – document everything before any cleanup begins
Practical Questions Homeowners Ask Before They Commit
That’s what it looks like, but here’s what’s actually happening: most homeowners don’t need a sales pitch before a repair call – they need a straight answer on what the scope is, whether this roof has years left, and whether a new roof is genuinely necessary or just the easier recommendation to make. Those are fair questions. They’re the same ones I’d ask if it were my house. Dennis Roofing’s job is to give you the real picture, not the one that’s easiest to sell.
Why Homeowners in Remsen Village Call Dennis Roofing
-
✔
Experienced project oversight on older Brooklyn residential roofs – we know how layered repair histories, chimney transitions, and mixed roof systems behave on the homes that actually exist in this neighborhood. -
✔
Insured and professional site practices – every job, every time, with clean communication before any work begins. -
✔
Clear explanation of repair vs. replacement scope – you’ll know exactly what we found, why we recommend what we do, and what the alternatives are. No guesswork passed along to you. -
✔
Help with insurance claim roofing documentation – when storm damage is involved, we can help you record the damage accurately and clearly before cleanup complicates the claim.
If your roof is giving you questions, call Dennis Roofing for a roof inspection, a targeted roof repair estimate, or an honest second opinion on whether you’re actually looking at a replacement. We’re in Brooklyn – we know these roofs – and we’ll tell you straight what’s going on up there.