Bushwick Has Flat Roofs on Almost Everything – Let’s Make Sure Yours Is Actually Watertight
Stop calling the same company back. In Bushwick, especially on flat roofs, the stain spreading across your ceiling rarely sits directly above where water first broke through – and if nobody’s traced the actual path yet, you’ve probably paid to fix the wrong thing more than once. This article is a better way to read what your roof is actually telling you before you hand over another check.
Why the Drip You See Rarely Marks the Real Failure
Stop calling the same company back. In Bushwick, that ceiling stain is a bad witness – it shows up last and points in the wrong direction. A flat roofing system is like a stage that holds its secrets until you know how to read it: the sound when you tap the membrane, the way water hesitates at a low seam instead of moving toward a drain, the hairline tension in a poorly welded lap that nobody noticed until the building’s been through forty freeze-thaw cycles. The roof tells on bad workmanship constantly. You just have to know the language.
That’s the story people tell themselves – that the wet spot is the problem. Here’s the roof version: water enters at one point, travels horizontally along the insulation layer or the decking, follows old patch lines like a trail, and finally drops through your ceiling somewhere completely different. I’m Lamar Boudreau, and with 17 years of flat-roof drainage and seam failure diagnosis under my belt, I can tell you that the gap between where water enters and where it appears inside can span eight, twelve, sometimes twenty feet on a standard Bushwick row building.
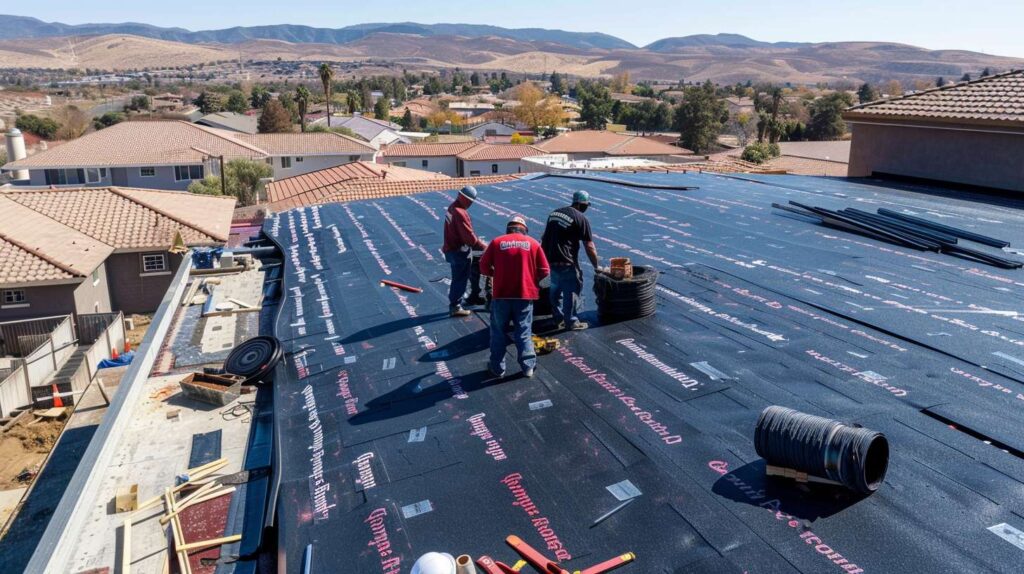
Low-slope and flat roofing – found on row houses, mixed-use buildings, and rear additions throughout the neighborhood.
Ponding water combined with a failed membrane seam or compromised edge detail – often hidden under old coating or an incompatible patch.
Roof inspection and leak tracing before any repair. Spending money without mapping the moisture path is how people pay twice.
Active interior water during a storm, ceiling bubbling or sagging, or membrane edge visibly lifting – these conditions require emergency roof repair, not a scheduled estimate.
Follow the Water Path Before You Spend Money
What a real inspection checks first
On a 22-foot tape, the mistake usually shows up before the stain does. I was on a Bushwick row building at 6:10 in the morning after one of those warm summer overnight storms – the super kept pointing me toward the skylight like it had confessed already. I walked the flat roofing field, and within ten minutes I’d found ponding water sitting around a lazy drain cut near the rear addition, and traced the actual entry point to a split seam someone had smeared over with coating about three years prior. That seam was under maybe a quarter-inch of old product, invisible unless you knew to probe it. The skylight was innocent. Bushwick row houses, mixed-use buildings with rear bump-outs, parapets on three sides, and drains that were sized and positioned for a different era of rainfall – that combination creates misleading leak paths that will fool anyone who doesn’t walk the whole field first.
A proper roof inspection and roof leak detection process isn’t just walking around looking for obvious holes. It means reading the field seams for tension and separation, checking drain bowls for debris and bowl integrity, examining edge metal for pull-back or gaps, inspecting every chimney flashing transition, looking at skylight curb seals, and checking how roof sections tie into each other across additions and level changes. Residential roofing and commercial roofing in Bushwick share the same problem: most buildings have layered repair histories, and water finds the path of least resistance through all of it.
| Roof Area | What We Look For | What It Usually Means | Likely Service |
|---|---|---|---|
| Drain Area | Bowl separation, debris blockage, membrane stress rings, reversed slope around drain | Chronic ponding; water backing up and sitting against membrane seams and edge details | Drain repair or replacement, slope correction, roof repair |
| Membrane Seams | Open lap edges, coating hiding separation, seam probe resistance (or lack of it) | Primary water entry point; often the real source behind stains blamed on other areas | Targeted seam repair matched to system (TPO, EPDM, modified bitumen) |
| Parapet Edge | Coping cap gaps, flashing pull-back, membrane termination lifting away from wall | Wind-driven rain entry; water running down interior face of parapet into roof assembly | Edge flashing repair, coping resealing, roof waterproofing |
| Skylight Curb | Curb-to-membrane seal condition, flashing tape separation, ponding at curb base | Water pooling upslope and flowing under the curb base – usually not the skylight glass itself | Skylight repair, curb reflashing, or drain improvement upslope |
| Chimney / Flashing Zone | Step flashing separation, deteriorated counter-flashing, cracked mortar at base, rust staining | Gap between chimney and flashing allowing water intrusion – often blamed on chimney but usually a flashing failure | Chimney flashing repair, counter-flashing replacement, resealing |
Know Which Situations Need Emergency Repair and Which Need a Plan
Here’s the part nobody likes hearing: not every active leak means you’re getting a full roof replacement today, but some conditions absolutely cannot wait for a scheduled estimate. One February afternoon, with sleet blowing sideways off Myrtle Avenue, I got called for emergency roof repair on a mixed-use building where the downstairs tenant was using baking trays to catch water coming through the ceiling. The building owner had already paid for roof leak repair twice – both times the crew went straight for the chimney because that’s where the worst staining was. The chimney flashing was fine. The real problem was wind-driven water slipping under a loose edge detail on an old rubber roof tie-in at the rear of the building, about twelve feet away from where anyone had ever looked. That job stuck with me because every dollar spent on the chimney was a dollar that made the actual damage worse by buying time instead of fixing it.
The loudest drip in the room is not always the leak doing the damage.
Compare Repair Paths by Roof Type Instead of Grabbing the Cheapest Patch
What changes from TPO to EPDM to modified bitumen
Flat roofs are honest right up until somebody “fixes” them badly. TPO roofing fails differently than EPDM roofing – TPO seams are heat-welded and fail from weld contamination or thermal cycling; EPDM seams are bonded with tape or adhesive and fail from adhesive breakdown or membrane shrinkage over time. Modified bitumen roofing is torch- or cold-applied and tends to fail at transitions and end laps. Old tar and gravel roof systems fail from aggregate displacement, dried-out bitumen, and edge flashing pullback. Coat all of them with the same generic product and you’ve hidden the problem while adding a new one. These systems don’t all fail the same way, so they don’t all get fixed the same way.
I remember a Saturday in early fall when a homeowner near the Wyckoff Avenue end of Bushwick wanted a full roof replacement – she was exhausted by recurring stains over the back bedroom and honestly, I don’t blame her. I did the roof inspection, walked to the parapet, and peeled back one section of membrane. Underneath was trapped moisture sitting inside a patchwork of old roof coating layered over incompatible repairs on a tar and gravel roof transition. The insulation in that section was damp but not saturated. The rest of the field was structurally sound. We ended up recommending a targeted repair and a proper drainage correction – not the giant job she expected that day. And honestly, I probably second-guessed myself more than she did. But I would rather disappoint someone with a smaller honest repair plan than sell a full replacement the roof hasn’t earned yet.
That said, roof replacement or a full new roof installation becomes the right call when you’ve got recurring leaks across multiple zones, saturated insulation that’s spread beyond one section, edge details failing around the whole perimeter, a repair history of incompatible patches that have made diagnosis nearly impossible, or a membrane that’s simply aged out. Here’s the insider tip worth keeping: before you sign off on any repair, ask the contractor whether the proposed material and method actually match the roof system that’s already installed. Not just whether the price sounds reasonable – whether the product is compatible. That one question will save you from a lot of bad patches.
When replacement becomes the honest recommendation
| Roof Type | Common Failure Pattern | Don’t Assume | Best Service Match |
|---|---|---|---|
| TPO Roofing | Weld failures at seams from contamination or thermal stress; edge pullback | That coating over a failed TPO seam will hold long-term – it won’t | Heat-welded seam repair by a TPO-certified applicator; proper edge termination |
| EPDM Roofing | Adhesive-bonded seam delamination; membrane shrinkage pulling flashings off walls | That a coat of sealant will stop an EPDM shrinkage problem | Seam tape re-bond, flashing reset, or section replacement with compatible EPDM material |
| Modified Bitumen | End-lap splitting, blister formation from trapped moisture, transition failures at additions | That a cold-applied patch works the same as a torch-applied repair – it doesn’t bond the same way | Torch or cold-applied modified bitumen roofing repair matched to existing system; flashing reset |
| Tar and Gravel Roof | Dried-out bitumen layers, aggregate displacement exposing felt, failed edge metal | That coating over an aged built-up roof extends its life meaningfully without addressing moisture below | Core sampling for moisture, targeted roof repair, or full tear-off and new roof installation |
| Asphalt Shingle Roofing | Granule loss, cracked or curling shingles, step flashing failure at walls and dormers | That replacing a few shingles fixes a systemic flashing or underlayment problem underneath | Targeted roof repair, full asphalt shingle roofing replacement if coverage is gone, flashing repair |
| Metal Roofing | Fastener backout, panel seam separation, rust at low points, failed sealant at penetrations | That generic caulk at a metal roofing seam is a permanent repair – thermal movement will break it open again | Fastener replacement, seam re-crimping, roof coating rated for metal, or panel section replacement |
Warning: The Risk of Incompatible Patch Materials
Smearing generic roof cement, random brush-applied coatings, or mismatched membrane patches over TPO roofing, EPDM roofing, modified bitumen roofing, or existing transition zones is one of the most expensive things you can do to a flat roof – even though it feels like a solution in the moment. Incompatible materials trap moisture inside the assembly, prevent proper adhesion of future repairs, hide seam tension failures that continue to grow, and can make subsequent roof repair or full roof replacement significantly more complex and costly. If the material isn’t specified for that roof system, it doesn’t belong on it.
Ask Better Questions Before Hiring Anyone to Touch the Roof
If I asked you where a flat roof is supposed to move water, could you point to it without guessing? Any contractor you hire should be able to answer that question in about thirty seconds – and their answer should mention drains, scuppers, slope direction, seam orientation, edge details, and how the proposed fix keeps water moving toward an exit rather than pooling somewhere new. Services like gutter installation, gutter repair, chimney flashing repair, skylight repair, roof waterproofing, roof maintenance, and storm damage repair are all genuinely useful – but only when they’re chosen because they align with how that specific roof is designed to shed water, not because they’re the most visible thing to fix.
If you want Dennis Roofing to get on your Bushwick flat roof, trace the actual leak path, and give you a straight recommendation – repair, replace, or stabilize – without guesswork or repeat visits for the same problem, call us now. We’d rather tell you the smaller honest truth on day one than sell you a bigger job the roof hasn’t earned yet.