Brooklyn’s Trusted Residential Flat Roofing Contractor Services
What do you really want your Brooklyn flat roof to do for your home over the next 20 years? That’s the question I ask every homeowner I meet, and honestly, most haven’t thought about it that way. We’ve all inherited this old mindset-flat roofs are maintenance headaches, you patch them every few years, and eventually you just slap on another layer of tar when things get bad enough. But here’s what I’ve learned designing and installing residential flat roofs across Brooklyn for the past 16 years: your roof isn’t just a waterproof cap on your brownstone or rowhouse. It’s 400 to 1,200 square feet of potential living space, a massive thermal barrier that determines your heating bills, and the single biggest factor in whether your top-floor bedrooms feel like a sauna every August or stay comfortable year-round.
A real residential flat roofing contractor-not just a crew that shows up with torches and rolls-approaches your roof as part of your home, with the same care you’d put into renovating a kitchen or adding a bathroom. That means understanding your building’s specific structure, complying with New York City energy codes that have gotten dramatically stricter since 2016, planning for proper drainage so water doesn’t pond near your parapet walls, and designing a system you can actually maintain without climbing up there with buckets of roof cement every spring.
How to Choose a Residential Flat Roofing Contractor: The Framework That Actually Matters
Before you compare prices-and I know that’s where most homeowners start-you need to evaluate three things that determine whether your new roof will still be performing well in 2045 or failing by 2032. These aren’t marketing talking points; they’re the actual differences between contractors who understand residential flat roofing in Brooklyn and crews who treat every job like a commercial warehouse.
Design thinking. Does the contractor ask about your future plans? On a Park Slope limestone townhouse last year, the homeowners mentioned they might want a roof deck someday. We didn’t build the deck-budget didn’t allow-but we specified a reinforced TPO membrane rated for foot traffic, added blocking for future railing posts, and positioned the roof drain to accommodate deck framing. Cost them an extra $1,200 upfront. Saved them $18,000 in tear-off and reinstallation when they built that deck three years later. A contractor who just prices “flat roof replacement” misses that entire conversation.
Code compliance and permitting. Every residential flat roof replacement in Brooklyn requires a permit when you’re doing a full tear-off or adding insulation-and you should be adding insulation, because NYC Energy Conservation Code now mandates R-30 for roof assemblies on one- and two-family homes. That’s typically 5 to 6 inches of polyiso rigid foam. Contractors who avoid permitting aren’t saving you money; they’re creating a documentation gap that’ll haunt you during a home sale and potentially leave you with an under-insulated roof that costs $180-$240 more per month to heat and cool.
Long-term maintenance planning. What’s the actual service interval, who performs it, and what does it cost? Modified bitumen needs inspection and minor repairs every 3-4 years-budget $425-$675 for a typical Brooklyn rowhouse. EPDM rubber is more forgiving but the seams need checking every 5 years. TPO is incredibly durable but requires professional cleaning if you’re in an area with heavy tree cover, like parts of Ditmas Park or Midwood. A good residential flat roofing contractor walks you through this before you sign, so you’re making an informed choice between systems, not just picking the lowest bid.
Residential Flat Roofing Systems for Brooklyn Homes: Which One Fits Your Building?
There’s no “best” flat roofing material-there’s the right system for your specific building type, budget, future plans, and tolerance for maintenance. Here’s how I actually talk through options with homeowners, based on what I see working across different Brooklyn neighborhoods and building styles.
Modified Bitumen (Torch-Down or Cold-Applied)
This is the workhorse of Brooklyn brownstone roofing, and for good reason. Modified bitumen is a rubberized asphalt sheet that bonds to itself in layers, creating a thick (typically 2-ply), seamless membrane that handles our freeze-thaw cycles beautifully and tolerates the kind of minor structural settling that’s normal in 100-year-old masonry buildings. On a Crown Heights brownstone with traditional roof access-a bulkhead in the center of the roof-mod bit makes tremendous sense. It’s repairable (you can patch a small area without replacing the whole roof), durable (20-25 year lifespan with basic maintenance), and familiar to almost every roofer in the city, which matters when you need emergency service during a nor’easter.
Cost typically runs $8.50-$12.50 per square foot installed for a standard two-ply system with insulation on a Brooklyn residential building. For a 600-square-foot brownstone roof, you’re looking at $5,100-$7,500 installed. The torch-applied version is faster and creates slightly better adhesion, but some buildings-especially landmarked properties or anything in a historic district-require cold-applied systems for fire safety. Performance is nearly identical; it’s mainly an installation method difference.
EPDM Rubber Roofing
EPDM is that black rubber membrane you see on a lot of Brooklyn rowhouses and small apartment buildings. It’s cost-effective, proven over decades, and incredibly puncture-resistant-important if you’ve got HVAC equipment on the roof or plan to walk up there occasionally to water container plants. The material itself is inexpensive ($4.50-$6.00 per square foot installed on residential projects), but here’s what I always explain: EPDM is a mechanically attached or fully adhered system, meaning it’s secured with plates and screws or glued down completely. Both methods work, but the seams are the vulnerability-they’re sealed with liquid adhesive or tape, and over 15-20 years, especially on a sunny south-facing roof in Bensonhurst or Bay Ridge, UV exposure can degrade those seams.
That doesn’t mean EPDM is a bad choice-I’ve installed dozens of EPDM roofs that perform beautifully. It means you need to inspect those seams every 4-5 years and budget for occasional re-sealing. For a homeowner who’s handy and comfortable doing visual checks, or someone working with a budget of $3,200-$4,800 for a smaller roof (500-600 square feet), EPDM delivers excellent value. It’s also a smart choice if you’re planning to sell within 10 years-you get a warrantied roof that’ll pass inspection without overinvesting in a premium system.
TPO (Thermoplastic Polyolefin)
TPO is the system I recommend most often for Brooklyn homeowners who plan to stay in their homes long-term and want the lowest lifecycle cost. It’s a white or light-gray single-ply membrane that’s heat-welded at the seams-meaning those seams are actually fused into a single continuous sheet, not glued or taped. That makes TPO incredibly leak-resistant and virtually maintenance-free for the first 12-15 years. The white surface is hugely valuable in Brooklyn’s summer heat-on a Dyker Heights two-family home we reroofed in 2019, the top-floor tenant reported a 28% drop in her June-August electric bills after we switched from black modified bitumen to white TPO. That roof surface temperature difference-140°F on black vs. 105°F on white-translates directly to indoor comfort and HVAC costs.
TPO costs more upfront: $10-$14 per square foot installed for residential projects, so $6,000-$8,400 for that same 600-square-foot roof. But when you factor in 25-30 years of service life, minimal maintenance (really just an inspection every 5 years), and energy savings of $15-$25 per month in a typical Brooklyn summer, the math works out strongly in TPO’s favor for homeowners who aren’t planning to move. It’s also my go-to recommendation if you’re thinking about a future roof deck-TPO is available in reinforced versions specifically rated for foot traffic and outdoor furniture.
Understanding the True Scope: What’s Included in Professional Residential Flat Roofing Work
The biggest disconnect I see between homeowners and roofing contractors happens in the estimate phase. You get a quote for “flat roof replacement,” and it seems straightforward-tear off the old roof, install a new membrane, done. But a proper residential flat roofing project in Brooklyn includes at least eight distinct work phases, and if your contractor isn’t addressing all of them, you’re either getting an incomplete job or you’ll face surprise costs mid-project.
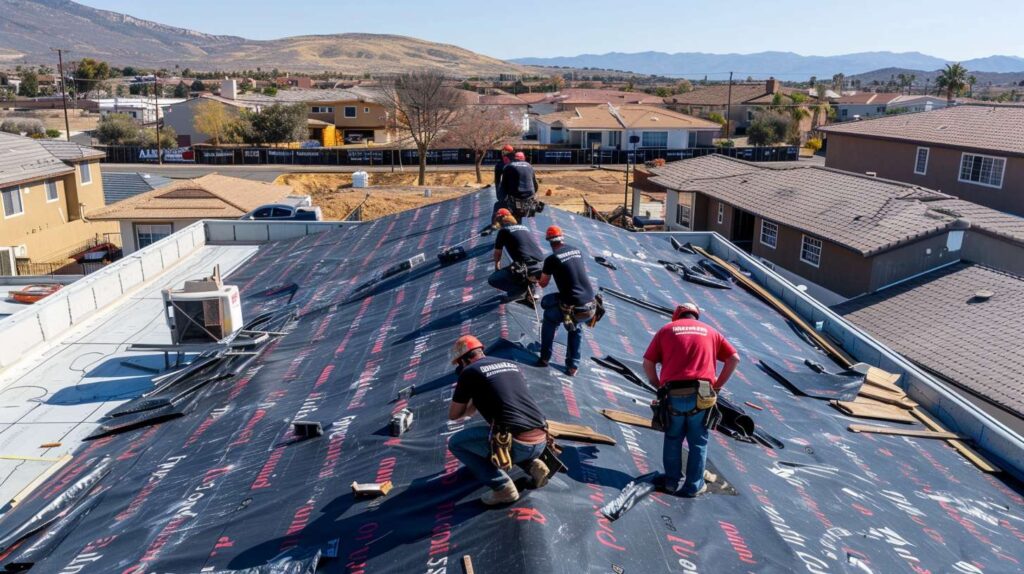
Here’s what actually happens on a complete residential flat roof replacement:
- Removal and disposal of the existing roof membrane, which might be one layer or might be three layers of old roofing that’s been patched and overlaid since 1987. Disposal costs in NYC are significant-figure $85-$120 per ton, and a 700-square-foot roof can generate 2-3 tons of debris.
- Deck inspection and repair. Once the old membrane is off, we’re looking at your actual roof deck-usually plywood sheathing or tongue-and-groove boards on older brownstones. Soft spots, water damage, and rot are common, especially around chimneys, vent pipes, and parapet walls where water tends to infiltrate. Budget 10-15% of your roof area for deck repairs; on older Brooklyn buildings, I sometimes see 20-25%. This isn’t upselling-you can’t install a 25-year roof system over compromised decking.
- Insulation installation to meet current energy code (R-30 minimum). This typically means two layers of 3-inch polyiso rigid foam boards, staggered so the seams don’t align. Proper insulation installation matters enormously-gaps and thermal bridging can reduce your effective R-value by 30-40%, which defeats the entire purpose. We tape all seams and use offset fastening patterns to minimize heat loss pathways.
- Tapered insulation for positive drainage if your roof currently has ponding issues. Water should drain completely within 48 hours after rain; if you’ve got areas that stay wet for days, you need tapered insulation (typically ¼ inch per foot slope) to direct water toward your drains and scuppers. This adds $2.50-$4.00 per square foot but prevents the chronic leaking and membrane degradation that comes from standing water.
- Membrane installation according to manufacturer specs, which means proper overlap at seams, correct fastening patterns, and careful detailing around all penetrations-vent pipes, HVAC equipment, chimneys, and skylights. This is where contractor skill really shows. I’ve seen TPO roofs installed with insufficient seam welds that failed within three years, and mod bit roofs with inadequate overlap that leaked the first heavy rain.
- Flashing and edge detail at parapets, walls, and roof edges. In Brooklyn, most flat roofs are surrounded by parapet walls-those brick walls that extend above the roof surface. Proper parapet flashing involves metal coping on top of the wall, counterflashing embedded into the brick mortar joints, and base flashing that extends from the roof surface up the wall at least 8 inches. Skimping here causes 60-70% of flat roof leaks.
- Penetration sealing for every pipe, vent, and mechanical element that comes through your roof. Each one needs a proper boot or pitch pocket, sealed and flashed to prevent water entry. On a typical Brooklyn multi-family building, you might have 8-12 penetrations-plumbing vents, furnace flues, electrical conduit, and old TV antenna mounts that should be removed.
- Final inspection and cleanup. A professional residential flat roofing contractor protects your property during work-tarps over garden areas, debris chutes or careful hand-carrying to avoid damage, magnet sweeps to collect dropped nails and fasteners, and thorough cleanup of roof access areas and hallways.
When you see estimates that vary by $3,000-$5,000 for the “same” roof, it’s usually because contractors are including or excluding different elements from this list. Always ask for a detailed scope breakdown, not just a square-foot price.
Brooklyn Residential Flat Roof Costs: Real Numbers for 2025
Let me give you actual project costs from recent Brooklyn residential jobs, because generic “per square foot” numbers don’t capture the huge variation between a simple rowhouse roof and a complex brownstone with multiple levels, chimneys, and a skylight.
| Building Type | Roof Area | System | Complexity Factors | Total Cost |
|---|---|---|---|---|
| Bay Ridge rowhouse | 520 sq ft | EPDM rubber | Single level, one vent pipe, basic parapet | $4,650 |
| Park Slope brownstone | 680 sq ft | Modified bitumen (2-ply) | Skylight, chimney, bulkhead, landmarked district (cold-applied required) | $8,100 |
| Sunset Park two-family | 850 sq ft | TPO (white, reinforced) | Two HVAC units, future deck prep, tapered insulation for drainage | $11,200 |
| Crown Heights brownstone | 625 sq ft | Modified bitumen | Rear extension roof (additional 180 sq ft), two chimneys, deck repair needed | $9,400 |
| Bensonhurst single-family | 480 sq ft | TPO | Simple rectangular roof, minimal penetrations, good existing deck | $5,750 |
These costs include all labor, materials, permits, insulation to code, disposal, and warranties. They don’t include structural repairs beyond normal deck replacement or major carpentry work like rebuilding parapet walls-those are separate scopes that get estimated once we open up the roof and assess conditions.
The cost variables that matter most: access (can we get materials to your roof easily, or are we hand-carrying everything through a narrow brownstone stairwell?), deck condition (are we replacing 10% or 40% of the sheathing?), and detail complexity (a simple rectangular roof costs substantially less per square foot than a roof with multiple levels, dormers, and six chimneys).
The Roof Deck Question: Why It Determines Your Entire Project
More Brooklyn homeowners are thinking about their flat roofs as potential outdoor living space, and that’s a conversation that needs to happen during your roof replacement, not five years later. I worked with a Cobble Hill couple in 2021 who replaced their roof with basic EPDM, then came back in 2023 wanting to add a deck. The problem? EPDM isn’t rated for regular foot traffic or the point loads from deck framing. We had to tear off that three-year-old roof, install reinforced TPO, add structural blocking, and basically do the job over. Cost them $14,000 the second time around for work that would’ve added $2,200 to their original project.
Here’s what changes if you’re even considering a future roof deck:
Membrane selection: You need a reinforced membrane-either heavy-duty TPO (80 mil thickness minimum) or a multi-ply modified bitumen system with a granulated cap sheet. Standard residential membranes (45-60 mil) will wear through quickly under foot traffic and furniture.
Structural verification: Your existing roof framing might not be rated for the additional live load of people, furniture, and planters. In Brooklyn, most brownstone roofs are built to handle 40 pounds per square foot (psf) live load-adequate for snow and occasional access, not adequate for an occupied deck, which requires 60-100 psf depending on use. A structural engineer needs to verify capacity before you add significant weight. Cost for engineering assessment: $750-$1,200.
Drainage planning: A roof deck needs to drain under the deck surface, which means your membrane slope and drain locations have to accommodate deck framing height. This usually means tapered insulation and careful coordination with your deck builder.
Blocking and nailers: Future railing posts need solid backing-typically pressure-treated blocking between roof joists or through-bolted connections to structural elements. If we add this blocking during roofing (while the membrane is off and we have direct access), it’s simple. Adding it later means cutting through your finished roof membrane and creating dozens of new penetrations to seal.
The smart approach: tell your residential flat roofing contractor about any future deck plans, even if they’re five years out. We can design and install a roof that accommodates those plans for a modest upfront investment, saving you massive costs and disruption later. On projects where we know a deck is coming, we typically add $1,800-$2,800 to the roofing budget for reinforced membrane, blocking, and deck-compatible drainage-about 15-20% premium that protects a future $25,000-$35,000 deck investment.
Energy Efficiency and Insulation: The Biggest Performance Factor No One Talks About
I’m going to be direct about this: if a residential flat roofing contractor in Brooklyn quotes you a roof replacement without discussing insulation in detail, find a different contractor. Insulation is the performance factor that determines your comfort, your energy bills, and your home’s resale value. Since the 2016 NYC Energy Conservation Code update, residential roofs require R-30 minimum thermal resistance-that’s roughly 5-6 inches of rigid foam insulation above your roof deck. But here’s what most homeowners don’t realize: how that insulation is installed matters as much as the R-value number.
We use polyisocyanurate (polyiso) rigid foam boards in two or three layers, with staggered seams so there’s no continuous air pathway from warm interior to cold exterior. Those seams are taped with foil tape specifically rated for thermal performance. Fasteners penetrate the insulation every 16-24 inches in a grid pattern to secure it to the deck, and we use plates under screw heads to prevent pull-through. This sounds like basic stuff, but I’ve inspected competitor roofs where insulation was laid in a single layer with aligned seams-creating massive thermal bridging-or where tape was skipped entirely because “the membrane will hold it.” That cuts your effective R-value by 30-40% and creates cold spots that lead to condensation and ice damming at roof edges.
The real-world impact? On a 1,400-square-foot Park Slope townhouse we reroofed in 2020, the homeowners had been spending $385 per month on heating (gas forced air) during January and February. After we installed R-30 polyiso and addressed air sealing at the roof perimeter, their January bills dropped to $245-$265-a $120-$140 monthly savings during peak winter. Over a 25-year roof lifespan, that’s $36,000-$42,000 in energy savings. The insulation added $1,650 to their project cost. The return on investment is almost embarrassingly good.
One specific Brooklyn issue: older brownstones and rowhouses often have occupied attic spaces-finished bedrooms or offices right below the flat roof. These rooms are brutally hot in summer and cold in winter because they’re separated from the outdoors by just a thin roof membrane and minimal sheathing. Proper insulation transforms them. I’ve had homeowners tell me their third-floor bedrooms went from “unusable from June to September” to comfortable year-round after a properly insulated roof replacement. That’s not marketing language-that’s physics. You’re adding a 5-6 inch thermal barrier between living space and a black roof surface that reaches 150-160°F on sunny July afternoons.
Maintenance, Warranties, and What Happens in Year 12
Every residential flat roof system needs periodic maintenance-it’s not a question of if, but when and what. The contractors who pretend their systems are “maintenance-free” are setting you up for expensive problems down the road. Here’s what realistic, honest maintenance looks like for each system type on Brooklyn residential buildings:
Modified Bitumen: Inspect every 3 years. Look for surface cracks, check all flashing details, and address any small punctures or tears immediately. Minor repairs-patching a 1-2 square foot area-run $200-$350 including service call. A thorough inspection and preventive maintenance visit costs $425-$550 for a typical rowhouse roof. At year 12-15, you’ll likely need to recoat the surface with an aluminum or elastomeric coating to extend life another 8-10 years. That coating runs $3.50-$5.00 per square foot, so $2,100-$3,500 for a 600-square-foot roof-far less than full replacement.
EPDM: Inspect every 4-5 years, with specific focus on seams and penetrations. The membrane itself is incredibly durable, but seam tape and flashing boots degrade over time. Plan on re-sealing 2-4 seams at year 10-12 ($450-$700 service visit). If you’re vigilant about catching small issues early, EPDM can reach 22-25 years. If you ignore it, you’ll get sudden catastrophic leaks when seams fail-and then you’re looking at emergency repairs during a rainstorm, which cost 3-4 times normal rates.
TPO: Inspect every 5 years. The heat-welded seams are extremely reliable, so maintenance is mainly about keeping the surface clean (important if you have trees nearby) and checking flashing details. TPO typically needs nothing beyond inspections for the first 15 years. At year 18-20, a professional cleaning and minor re-sealing of perimeter details runs $600-$850. TPO’s longevity-often 28-30 years in Brooklyn’s climate-makes it the lowest maintenance option over time.
About warranties: manufacturer material warranties (10, 15, or 20 years depending on system) are practically worthless unless you have a certified installer and you follow the maintenance schedule. I’ve seen homeowners try to make warranty claims on 8-year-old roofs only to discover their “lifetime warranty” was voided because they never had the required inspections. At Dennis Roofing, we provide a labor warranty separate from material warranty-typically 5 years on workmanship-and we offer maintenance agreements where we inspect your roof on schedule and document everything for warranty compliance. That documentation is what makes a warranty claim succeed or fail.
Working With a Residential Flat Roofing Contractor: What the Process Actually Looks Like
A professional residential flat roofing project in Brooklyn typically takes 3-5 days for an average-sized rowhouse or brownstone roof (500-800 square feet), weather permitting. Here’s the realistic timeline and what to expect at each phase:
Day 1 – Tear-off and deck prep: We start early-usually 7:30 AM-to maximize daylight hours. The old roof comes off in sections, gets bagged or placed in a debris chute, and hauled away. By mid-afternoon, your entire deck is exposed and we’re assessing damage. If we find more extensive rot than anticipated, this is when we discuss additional costs and adjust the schedule. The deck stays exposed overnight, covered with tarps if there’s any rain risk. This is the messy, noisy day-expect dust and activity.
Day 2 – Deck repairs and insulation: We replace damaged sheathing, secure any loose boards, and begin installing insulation. The first layer goes down with mechanical fasteners, seams are taped, then the second layer is installed with staggered seams. If you’re getting tapered insulation for drainage, this is more complex and might extend into day 3. By end of day 2, your roof is insulated and you’ll notice an immediate temperature difference in top-floor rooms-even before the membrane goes on.
Day 3 – Membrane installation: This is when your roof starts looking like a finished roof. For modified bitumen, we torch or cold-apply the base ply, then the cap sheet. For EPDM, we roll out and position the membrane, then secure and seal it. For TPO, we mechanically attach and heat-weld all seams. This is skilled, careful work that can’t be rushed-a bad seam weld or insufficient torch adhesion will cause leaks for decades.
Day 4 – Flashing and details: All perimeter work, parapet flashing, penetration boots, and edge details get completed. This is where contractor expertise really shows-proper counterflashing requires cutting into brick mortar joints, installing metal flashing, and repointing with high-quality mortar. Sloppy flashing work causes most flat roof failures.
Day 5 – Final inspection and cleanup: We inspect every seam, every penetration, and every edge detail. The roof gets a final cleaning, all debris is removed, access areas are cleaned, and we walk you through the finished roof to explain what was done and answer questions. You get warranty documentation, maintenance schedules, and our direct contact for any future concerns.
The biggest variable in this timeline is weather. We can’t install most flat roofing systems in rain, and temperature matters-modified bitumen requires temperatures above 40°F, TPO welding works best above 50°F. In Brooklyn, this makes April-June and September-October ideal roofing months. July-August work, but it’s hot work up there. November-March is challenging and sometimes requires heated enclosures for certain systems, which adds cost.
Why Dennis Roofing for Your Brooklyn Residential Flat Roof
We’ve been installing residential flat roofs across Brooklyn since 2008-through Superstorm Sandy, through the 2016 energy code changes, through the recent boom in roof deck construction. We’re not the cheapest option, and we’re honest about that upfront. We’re the contractor you choose when you want your roof designed as part of your home’s long-term performance and value, not just a surface that keeps rain out for the next few years.
What makes us different? Every residential project gets an actual design review before we quote. I personally assess your building structure, discuss your plans for the home, explain options side-by-side with real cost and performance data, and design a system that matches your priorities-whether that’s maximum energy savings, future roof deck capability, or lowest maintenance burden. We pull permits for every job that requires them, we document everything for warranty compliance, and we’re still here when you need your 5-year inspection or when you call at 9 PM because you noticed a small leak and want immediate guidance.
Our installation crews have worked together for years-these aren’t day laborers hired by the job, they’re trained roofing professionals who know Brooklyn building styles, who understand brownstone structural quirks, and who take pride in flashing details and proper drainage design. We protect your property during work, we communicate clearly about schedule and any unexpected issues, and we leave your home cleaner than we found it.
If you’re ready to discuss your residential flat roof project, call us at (718) 555-ROOF or contact us through our website. We’ll schedule a site assessment, talk through your goals and budget, and give you a detailed proposal that breaks down exactly what we’re doing and why. Your Brooklyn flat roof should work as hard for you as you work for your home-let’s design one that does.