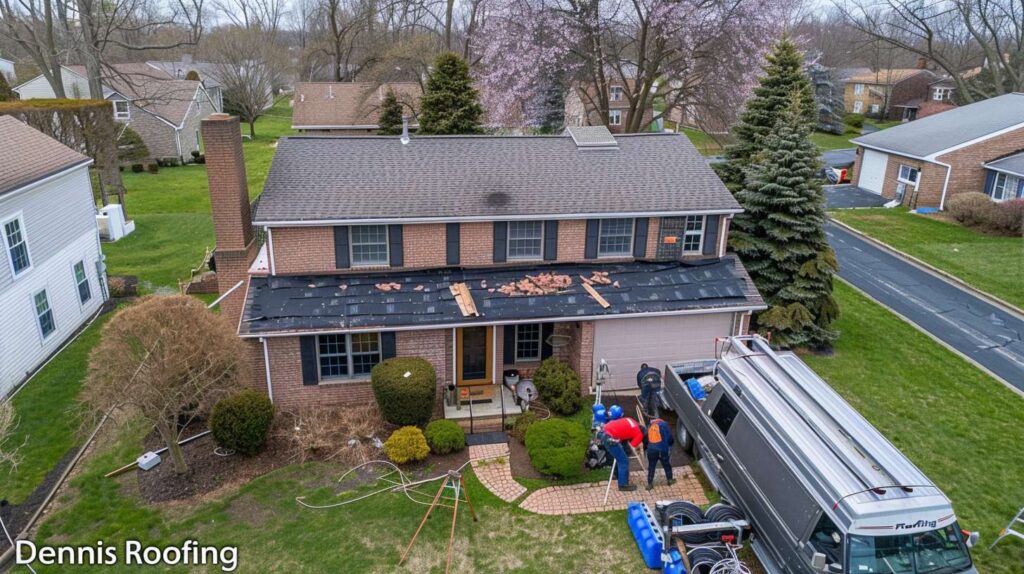
Expert Replacement Slate Roof Tiles Services in Brooklyn, NY
Replacement slate roof tiles in Brooklyn typically cost between $275 and $520 per square (100 square feet), including materials and labor, depending on slate thickness, color matching complexity, and roof accessibility. Here’s what most homeowners don’t realize: when you see three or four broken tiles on a 60-year-old slate roof, you almost never need a full replacement. What you need is selective tile replacement-swapping out damaged pieces while keeping everything that’s still solid. Done right, this approach can extend your roof’s life by another 20 to 30 years without destroying the original character that makes Brooklyn brownstones and rowhouses so distinctive.
The key word is “selective.” I’ve been working with slate for 15 years, and the biggest problem I see is homeowners getting pushed toward complete tear-offs when what they really need is maybe 40 replacement tiles and some careful flashing work around a chimney. The difference between those two approaches? About $18,000 to $35,000 in unnecessary spending.
When Replacement Slate Roof Tiles Are the Right Solution
Most slate roofs in Brooklyn were installed between 1890 and 1940, using material from Pennsylvania, Vermont, or New York quarries. Good slate lasts 75 to 150 years depending on grade and exposure. The tiles themselves often outlive the copper nails holding them in place.
You need replacement slate roof tiles-not a full roof-when:
- Tile breakage is localized: Damage clusters around one valley, chimney, or exposure point rather than spread evenly across the entire roof
- The majority looks solid: When you walk the roof (safely, with proper equipment), most tiles still ring like ceramic when tapped-no dull thuds indicating delamination
- Underlayment isn’t rotted: If you can see the felt or skip sheathing through missing tiles and it’s dry or only surface-weathered, the roof structure is probably fine
- Nail sickness is minimal: Only a small percentage of tiles are slipping because the fasteners rusted through
On a Clinton Hill townhouse last spring, the owner called us expecting a $45,000 quote for a new roof. She had maybe 20 broken tiles visible from the street and was panicking. When we actually got up there, we found 34 tiles that needed replacement, one valley that needed reflashing, and about 180 tiles total that were absolutely perfect-thick Pennsylvania black slate with barely any surface wear. We replaced what needed replacing for $8,200, and that roof is good for at least another generation.
But here’s the flip side: sometimes what looks like a simple tile problem is actually telling you the whole system is failing. If you’re losing tiles across multiple roof planes, if the exposure feels soft underfoot, or if you’re seeing water damage inside on multiple floors, replacement tiles alone won’t solve your problem. That’s when you need to talk about structural repairs or, yes, a full replacement.
Matching Original Slate: Why It’s Harder Than It Looks
This is where most tile replacement projects get tricky. Brooklyn has roofs covered in slate from quarries that shut down 80 years ago. Your building might have Bangor Gray from Pennsylvania, Unfading Green from Vermont, or Monson Black from Massachusetts. Each quarry produced slate with specific mineral content that affects how it weathers and what color it turns after decades of exposure.
A brand-new Vermont Unfading Green tile looks completely different from a 90-year-old Vermont Unfading Green that’s been facing south on a Prospect Heights roof. The old one has oxidized, picked up surface texture from freeze-thaw cycles, and developed a patina you can’t fake. If you just pop in new tiles without thinking about weathering, you end up with obvious patches that look like someone stuck Band-Aids on the roof.
I keep relationships with three specialized slate suppliers who stock salvaged material and can source close matches from active quarries. When we’re doing replacement work, I usually bring samples to the site and hold them against the existing roof in natural light before ordering a full bundle. Sometimes we’ll order intentionally weathered stock. Sometimes we source reclaimed slate from a demolished building in a similar neighborhood. And sometimes-if the homeowner wants perfection and the budget allows-we’ll artificially weather new tiles using specific treatments that accelerate oxidation.
| Slate Source/Type | Color When New | Color After 50+ Years | Current Availability | Cost Per Tile |
|---|---|---|---|---|
| Pennsylvania Black | Deep charcoal | Charcoal with slight brown | Readily available (active quarries) | $8-$14 |
| Vermont Unfading Green | Dark green-gray | Mottled green-gray | Available, some lead time | $11-$18 |
| Vermont Purple | Purple-gray | Weathered purple-brown | Limited (some quarries active) | $15-$24 |
| Monson Red | Burgundy-red | Deep red-brown | Salvage only (quarry closed 1938) | $18-$35 |
| Buckingham Purple/Black | Purple-black variegated | Complex mottled purple-gray | Very limited, mostly salvage | $20-$40 |
Here’s a specific example: Fort Greene has dozens of rowhouses with random-width Pennsylvania slate in mixed colors-blacks, grays, and occasional purple-grays all blended together. That’s not just aesthetic; it’s how those roofs were originally laid, using multiple quarry sources to create visual interest. When you need to replace tiles on a random-width pattern roof, you can’t just order one color and one size. You need to match the width distribution (usually three to five different widths ranging from 9 to 14 inches) and the color variation, or your repair will stand out immediately.
The Technical Side: Thickness, Headlap, and Fastening Details
Most people don’t think about this until they’re standing on a roof with a contractor, but slate thickness matters enormously for replacement work. Standard commercial slate runs 3/16 inch to 1/4 inch thick. Heavy slate goes 3/8 inch to 1/2 inch. Extra heavy can hit 3/4 inch or more.
If your original roof was installed with 3/8-inch slate and you replace broken tiles with standard 3/16-inch material, you’ve created thickness mismatches that affect how water sheds, how the tiles interlock, and how weather gets under the headlap. Headlap is the vertical overlap where one course of slate covers the course two rows below it. Proper headlap is typically 3 inches minimum, and it’s determined by roof pitch and tile length.
When I’m installing replacement slate roof tiles, I’m checking three things obsessively:
Thickness match: New tiles should be within 1/16 inch of the surrounding originals, or you’ll get uneven courses and potential leak points.
Proper fastening: Slate should be nailed-never screwed-with copper nails only. Stainless can work in a pinch, but copper is traditional and correct. Each tile gets two nails positioned about 2 inches from the side edges and 2 inches above the exposure line. The nail should go through the slate and into solid decking, with just enough tension to hold the tile flat without cracking it.
Correct headlap: This varies by pitch. On a 6:12 pitch (common in Brooklyn), you want 3 inches minimum. On lower pitches, you might need 4 inches. If the roof has lost fasteners and tiles have slipped, you might find the original headlap was compromised, which is why those tiles are failing now.
On a Park Slope project last year, we discovered someone had done a “repair” about 15 years prior using galvanized nails and thin architectural slate meant for vertical wall cladding, not roofing. Every single one of those repair tiles was either slipping or broken, and the galvanized nails had corroded down to rust stubs. We pulled all 28 of those incorrect tiles, sourced proper thickness Pennsylvania black, and refastened everything with copper. That’s what a real repair looks like.
Working Around Flashing and Complex Roof Geometry
Replacement slate work in Brooklyn almost always involves flashing complications. Most of these buildings have copper valleys, step flashing at sidewalls, cricket flashing behind chimneys, and apron flashing at roof-to-wall transitions. When tiles fail near these details, you can’t just swap the slate-you have to address why the tile failed in the first place.
Common scenario: tiles are breaking in a 3-foot zone on the downslope side of a chimney. That’s usually not a slate problem. That’s telling you the cricket flashing is either missing, undersized, or installed incorrectly, so water and ice are pooling against the chimney and freeze-thaw cycling is destroying the slate. If we just replace those tiles without rebuilding the cricket and installing proper counterflashing, those new tiles will crack within two winters.
Another pattern I see constantly: tiles failing along valley edges. The valley copper is probably fine structurally, but it was originally installed with the slate overlapping the metal by only 1 to 1.5 inches, which is too tight by modern standards. Water wicks under the slate during heavy rain or snowmelt, the wood underneath deteriorates, and fasteners fail. The fix isn’t just new tiles-it’s carefully pulling back the valley edges, installing ice-and-water membrane if it wasn’t there originally, re-laying the copper if needed, and then replacing tiles with proper 3-inch overlap onto the metal.
This kind of work takes time. I can replace a dozen straightforward tiles in open field (the main uninterrupted roof plane) in about 90 minutes. Those same dozen tiles around a chimney or in a valley? That’s a half-day job, maybe longer if the flashing needs fabrication or soldering.
Dealing With “Nail Sickness” and Whole-Section Failures
Nail sickness is what we call it when the fasteners corrode and tiles start slipping out of position even though the slate itself is still good. It’s incredibly common on roofs from the 1920s and earlier that were installed with iron or steel nails instead of copper.
If you’ve got nail sickness affecting 20 percent or more of a roof section, replacement tiles alone won’t help-you need to pull and re-slate that entire section. This is a gray area where it’s not quite a full roof replacement but definitely more involved than spot repairs.
Here’s how we assess it: if I can walk a section and more than one tile in every five is loose or slipping, and tapping the visible nail heads shows corrosion, we’re looking at systematic nail failure. At that point, the right approach is to carefully remove all tiles from that section (tagging and staging them if they’re reusable), inspect and repair the underlayment and decking, then re-nail everything with copper fasteners. We’ll reuse 70 to 80 percent of the original slate and fill gaps with matched replacement slate roof tiles.
This happened on a Bed-Stuy three-story last fall. The rear slope had widespread nail sickness-probably 60 tiles slipping or already fallen. The front slope was perfect. We pulled and re-slated just the back, reusing 48 of the original tiles and adding 19 replacements we sourced from a demolished building in Clinton Hill. Total cost was $11,400, compared to the $52,000 another contractor quoted for replacing the entire roof.
DIY Replacement vs. Professional Installation
I’ll be direct: replacing slate roof tiles is not a good DIY project unless you have actual roofing experience and the right safety equipment. Slate is brittle, walking on it improperly will break tiles, and working at height on a pitched surface is legitimately dangerous.
That said, here’s what’s involved if you’re determined or just curious about the process:
You need a slate ripper (a flat metal tool with a hooked end for sliding under tiles and cutting nails), a slate hammer (with a pointed end for punching holes and a sharp edge for trimming), copper nails, and a stable ladder setup with roof jacks and planks to distribute your weight. You also need replacement tiles that actually match.
The removal process: slide the ripper up under the broken tile until you feel it catch on a nail shank, then hammer the ripper to cut through the nail. Do this for both nails holding the tile. Remove the broken pieces carefully-they’re sharp. Slide the new tile into position, making sure it sits flush with the surrounding course. Here’s the trick: you can’t nail through the top of the replacement tile because it’s covered by the course above it. Instead, you either use a copper bib (a small clip that hooks over the tile and nails to the deck) or you very carefully lift the tiles in the course above just enough to access the nailing zone.
If that sounds tedious and finicky, it is. And if you crack surrounding tiles while doing it, you’ve just multiplied your problem. For most Brooklyn homeowners, paying a professional $175 to $280 per hour for this kind of precision work is money well spent.
Costs, Timelines, and What to Expect
Small replacement slate roof tile jobs (under 30 tiles) typically run $1,800 to $4,200 depending on access, matching complexity, and whether flashing work is involved. Mid-size jobs (30 to 100 tiles) land between $4,200 and $12,500. If you’re getting into section re-slating with 100-plus tiles, you’re looking at $12,500 to $28,000 depending on roof area and complications.
Material costs are usually 25 to 35 percent of the total, with labor and overhead making up the rest. Scaffolding or specialized access equipment can add $1,200 to $3,500 to a job if the roof isn’t safely accessible by ladder.
Timeline-wise, straightforward tile replacement takes one to three days. Complex jobs involving flashing repairs, section re-slating, or custom color matching can stretch to a week or more, especially if we’re waiting on salvaged materials or custom fabrications.
Most reputable slate contractors in Brooklyn will do a roof inspection for $250 to $400, which includes a written assessment of exactly how many tiles need replacement, what flashing issues exist, and an honest opinion about whether you’re looking at repairs or replacement. That inspection cost usually applies toward the work if you hire them.
Choosing the Right Contractor for Slate Work
Not every roofer can work with slate. It’s a specialized skill set, and plenty of otherwise competent asphalt or flat-roof contractors have never touched the material. When you’re vetting someone for replacement slate roof tiles, ask these specific questions:
How many slate roofs do you work on annually? You want someone who does slate regularly, not occasionally. Five to ten slate projects per year minimum suggests actual specialization.
Can you source matched slate for my specific roof? They should ask about your slate color, texture, and thickness before giving you a price. If they quote immediately without seeing the roof, that’s a red flag.
What fasteners do you use? The only correct answer is copper nails. If they mention stainless or galvanized as standard, walk away.
Do you have current projects I can see? Ideally in Brooklyn, ideally on similar buildings. Photos are fine, but seeing actual work is better.
Dennis Roofing has been handling slate replacement throughout Brooklyn for years, with specific experience in historic districts where preservation standards matter. We keep detailed records of slate sources, maintain supplier relationships for hard-to-find materials, and we’re comfortable working with Landmarks Preservation Commission requirements when necessary.
Preservation Considerations and Building Department Requirements
If your building is in a historic district-and large parts of Brooklyn Heights, Fort Greene, Park Slope, Clinton Hill, and other neighborhoods are landmarked-you may need Landmarks approval before doing slate work, even for repairs. The rules vary, but generally, in-kind replacement (matching original materials exactly) doesn’t require formal application, while visible alterations do.
Building permits are generally not required for slate tile replacement that doesn’t involve structural changes to the roof deck. However, if you’re doing section re-slating that requires removing and replacing sheathing, or if you’re adding significant weight with a slate upgrade on a building that previously had lighter roofing, the NYC Department of Buildings may want to see engineered drawings confirming the structure can handle the load.
Slate weighs 7 to 15 pounds per square foot depending on thickness, compared to 2 to 3 pounds for asphalt shingles. Most pre-war Brooklyn buildings were built assuming slate loads, but if someone replaced the original slate with asphalt decades ago and now you’re going back to slate, structural review becomes important.
We handle these coordination issues routinely and can tell you upfront whether your project will need permits, landmark approvals, or engineer involvement based on scope and location.
Long-Term Maintenance After Tile Replacement
Once you’ve invested in proper replacement slate roof tiles, protect that investment with basic maintenance. Annual inspections catch small problems-one or two loose tiles, a flashing gap developing, debris buildup in valleys-before they become expensive emergencies.
Keep gutters clear so water doesn’t back up under the slate edges. Trim tree branches that hang over the roof; falling limbs are one of the most common causes of slate breakage. And if you see a broken tile, address it within a season or two. Water intrusion spreads damage quickly once it starts.
Slate roofs don’t need much, but they do need attention. Think of replacement tiles as filling cavities-you fix them promptly to prevent bigger problems, and then the whole system keeps working beautifully for decades more.
If you’re seeing broken or missing slate on your Brooklyn roof and you’re not sure whether you need spot repairs or something more extensive, we can assess it honestly and give you options that make sense for your building and budget. Most of the time, targeted replacement slate roof tiles are exactly what’s needed-and they’ll give you another generation of protection from a roof system that’s already proven itself over the last century.