
Building a Flat Roof From the Ground Up – Here’s How We Make Sure It’s Done Right
Drainage Sets the Entire Build
I genuinely think this matters more than most contractors want to admit: a flat roof is never built “flat,” because the very first job is directing water intentionally – deciding where it goes before a single layer of material touches the deck. That’s the real starting point. Skipping that conversation is like calling a stage change on opening night without marking the cues first – one rushed move early, and everything that follows pays for it, quietly, until it doesn’t.
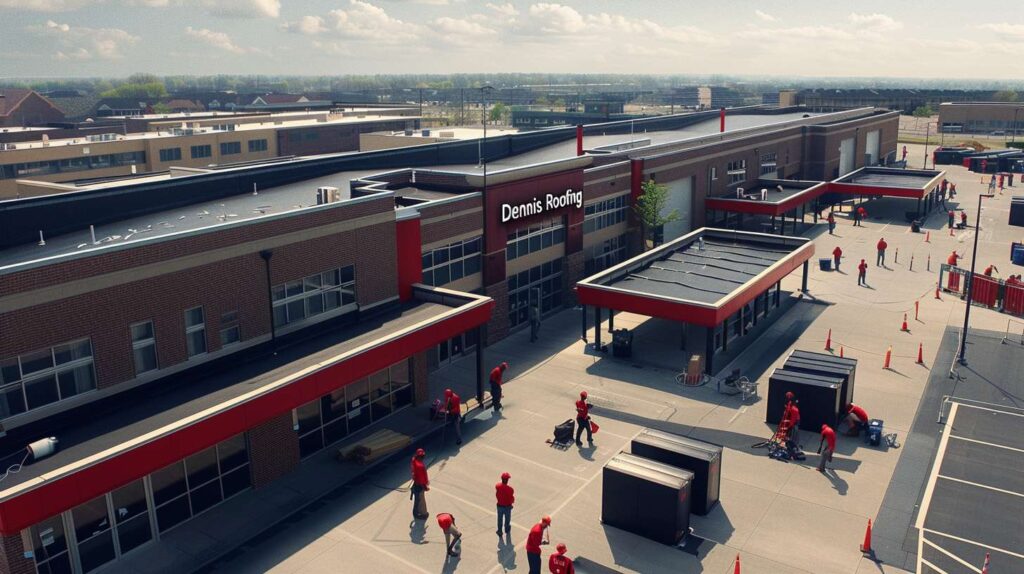
Before that sequencing can even begin, the crew has to look at what’s already there. We check drain locations, map the slope direction, figure out whether tapered insulation is needed, and confirm whether the existing deck can actually carry a correct build – not just a new one. This is where the order matters, because our flat roof construction services are built on the premise that you don’t solve a drainage problem by covering it. You solve it before the first board goes down.
First-Pass Planning: Before Any Materials Are Installed
-
1
Inspect the deck and existing drain conditions
Walk every square foot. Check for soft spots, rot, missing fasteners, and drain bowls that are already compromised. -
2
Identify low spots and any ponding history
Staining patterns and watermarks on old membrane tell you where water has been sitting and for how long. -
3
Map slope direction toward drains or scuppers
Confirm the grade flows where it needs to go – and flag anywhere it doesn’t before the slope correction plan is set. -
4
Choose the insulation and taper strategy
Decide whether tapered insulation, a crickets system, or structural correction is the right call for this specific roof geometry. -
5
Confirm edge and flashing heights before the build starts
Parapet heights, scupper elevations, and edge metal placement have to be reconciled with the finished roof plane now – not after installation begins.
Deck Conditions and Slope Corrections Come Before Membrane Work
What Gets Repaired Instead of Covered Up
At the drain line, everything tells on itself. I remember a sticky July morning in East Flatbush when a customer kept asking why we were spending so much time examining the deck before any visible progress started – by 8:15, the sun was already bouncing hard off the old surface, and I walked him over to a soft section near the rear drain that nobody had flagged before. That section would have gone under the new system and rotted out quietly for another couple of seasons before showing up as a ceiling problem two floors below. In Brooklyn, block-by-block realities matter: older structures, roofs with two or three patch histories layered on top of each other, and downpours that hit Flatbush Avenue hard and fast – those conditions mean hidden weak spots don’t stay hidden for long. He called two days later and said he finally understood why “starting slow” was actually the faster way.
Right after that, the practical decisions kick in: which sections of damaged decking need full replacement, which low areas need correction before insulation goes down, and how the boards need to be staged so rows stay true across the whole plane. As Latasha Monroe, who has spent 17 years around Brooklyn roof crews coordinating sequencing-heavy projects, I’ll tell you straight – the material layout decisions made at this phase determine whether everything above them holds or drifts. You don’t make those calls by feel. You make them by checking, measuring, and being willing to add a day to the prep rather than three weeks to a callback.
| Component | What We Check | Why It Matters | If It Gets Skipped |
|---|---|---|---|
| Roof Deck Structure | Soft spots, delamination, rot, fastener pull-through, moisture content | Everything above it depends on a stable, dry base | New system compresses and fails from underneath within 1-3 seasons |
| Existing Drain Bowls | Clamping ring condition, elevation relative to deck, debris blockage | A compromised drain bowl undermines the new membrane connection | Ponding develops at the lowest point – right where drainage was supposed to happen |
| Low Spots and Ponding Zones | Stain patterns, membrane deflection, water shadow rings on old surface | Tells you where slope correction is needed before insulation is placed | New roof ponds in the same places the old one did – nothing changed |
| Parapet and Wall Bases | Brick integrity, mortar joints, any existing through-wall moisture pathways | Flashing terminations need sound substrate to seal against | Flashing lifts or separates; water enters the wall assembly behind the membrane |
| Existing Penetrations | HVAC curbs, pipe boots, vent collars – condition and height above finished deck | Penetration heights must account for insulation thickness before membrane wraps them | Underdressed penetrations become leak points within the first rain season |
Do Not Cover Wet or Soft Deck Areas
Installing new roofing materials over moisture-damaged decking or unresolved low spots doesn’t hide the problem – it seals it in. Trapped moisture accelerates deck deterioration, shortens membrane life dramatically, and turns what should be a 20-year roof into a 5-year callback. If the deck isn’t right, the build doesn’t start.
Layer Placement Has to Stay Disciplined Once the Roof Opens Up
Why Layout Drift Becomes a Leak Problem Later
One cold October afternoon in Bay Ridge, I spoke with a retired school custodian who watched every phase of the build from the sidewalk with a notepad tucked in his jacket pocket – the kind of observer who actually pays attention. He stopped me while insulation boards were being staged on the deck and asked, genuinely, why material layout mattered so much before a single fastener went in. I told him flat roof construction is like setting the rows before you place the first brick in a pattern: if the lines drift early, the mistakes multiply quietly, and by the time the membrane goes down you’ve got seams landing in the wrong places, boards bridging over low spots, and fastening patterns that don’t hold to spec. He nodded and wrote it down. And here’s the insider part that a homeowner watching from the sidewalk won’t always see – a disciplined crew dry-stages the full insulation layout around penetrations and drains before fastening anything, because that’s the only way to find the problem rows before they’re locked in.
Installation Discipline Points During the Active Build
- ✅ Stagger insulation joints – offset each row so seams never stack directly above each other
- ✅ Keep drainage pathways clear during staging – boards should never bridge over or crowd drain bowls
- ✅ Align fastening pattern to manufacturer spec – spacing and pull-out values are not suggestions
- ✅ Avoid rushed seam work at penetrations – these are the highest-risk zones for moisture entry and need full attention
- ✅ Verify terminations before closing edges – every edge, wall, and curb termination gets checked before perimeter work seals it off
- ✅ Recheck slope after each layer is added – insulation thickness changes the finished plane, and a quick check catches drift before the membrane goes down
Details at Edges, Penetrations, and Drains Decide Whether the System Holds
Where a Good-Looking Roof Can Still Fail
If you were standing next to me, I’d ask you this first: where is the water supposed to go? I had to ask that exact question on a windy spring evening in Bensonhurst when a landlord called, frustrated, because another contractor had framed a flat roof with almost no real attention to drainage – and water had started ponding before the job was even technically finished. I was standing beside a folding table with marked-up drawings while the crew went back over slope lines in the fading light. That moment stuck with me because it showed exactly where things unravel: not in the middle of the membrane, but at edge metal, drain bowls, penetration flashings, and parapet terminations. Those are the spots where the system either supports everything above it or quietly betrays it.
If the water path is unclear on paper, it will be worse on the roof.
Here’s the blunt version: neat-looking membrane does not equal correct construction. A roof that looks clean from street level can still be holding water at every pipe collar, sitting low at a scupper that was set at the wrong elevation, or pulling away from a parapet wall because the base flashing wasn’t run to the right height. The membrane being smooth and seam-free is one checkpoint. It is not the only one, and treating it that way is where expensive surprises come from.
Three things have to be right before anybody should feel confident in a flat roof build. First, the water path has to be clear and unobstructed from every point on the roof to a drain or scupper – no guessing, no hoping. Second, the attachment has to be secure across the full assembly: insulation fastening, membrane bonding, and edge metal anchoring all holding to spec. Third, every transition point – every place where the membrane meets something that interrupts it – has to be sealed and terminated correctly, because that’s where water finds its way in when something was done halfway.
Myth vs. Fact: Flat Roof Construction
| Myth | Fact |
|---|---|
| A flat roof is built level. | A correctly built flat roof has designed slope – typically ¼” per foot minimum – directing water to drains or scuppers. Level is a drainage failure. |
| The membrane is the only layer that matters. | The membrane is the visible finish layer. The deck, insulation, slope correction, and detail work are what the membrane depends on to perform correctly. |
| Drains will fix a bad slope on their own. | A drain set in a low spot doesn’t fix slope – it just gives standing water somewhere to eventually leave. Slope has to be built into the assembly, not managed by gravity after the fact. |
| Edge details are cosmetic. | Edge metal, coping, and perimeter terminations are structural anchors for the membrane. They keep wind from lifting the system and water from entering behind the field sheet. |
Questions Worth Asking Before You Approve a New Flat Roof Build
A flat roof built wrong behaves like a stage set with one loose brace – fine until the pressure shows up. And the pressure always shows up, whether that’s the first heavy August rain on Eastern Parkway or a January freeze-thaw that finds every unresolved seam on the block. Before you sign off on any flat roof project, you’ll want to ask your contractor four specific things: where exactly will the water drain and how is slope being created for this roof’s geometry? Which deck sections, if any, are being replaced versus overlaid? What insulation or taper system is specified and how is the layout being staged? And how are edge details, parapet flashing, and penetrations being handled – because those aren’t afterthoughts, they’re the system.
Flat Roof Construction – Homeowner FAQ
How is slope created on a flat roof?
Most flat roofs use tapered insulation boards – boards manufactured with a built-in angle – to create slope toward drains or scuppers. On some buildings, structural framing can be adjusted, or lightweight fill can be used to build up low areas. The method depends on the deck condition, the drain layout, and the thickness of insulation specified. The point is that slope is intentionally designed and built in – it doesn’t happen by accident.
Can a new flat roof go over the old one?
Sometimes, but not always. Overlaying is only appropriate when the existing deck is structurally sound, dry, and can support the added weight of a new assembly. If there’s moisture in the existing insulation, soft decking, or drainage problems that need correction, overlay just locks those issues in. Local building codes in New York also limit how many roofing layers can be stacked – worth confirming before assuming overlay is an option.
What causes ponding on a newly built flat roof?
Ponding on a new roof almost always means slope was insufficient, incorrectly planned, or lost during installation because boards weren’t staged and checked carefully. It can also result from a drain set at the wrong elevation, or low spots in the deck that weren’t corrected before materials went down. A roof that ponds within the first season wasn’t built with drainage as the first priority – and that’s a sequencing problem, not a material problem.
Why does insulation layout matter so much?
Insulation layout controls where seams land, how slope runs across the field, and where fasteners anchor the assembly. If boards are placed without planning the rows around drains and penetrations first, seams end up in high-stress locations, the slope can drift off-direction, and the fastening pattern stops holding to spec. Dry-staging the full layout before fastening begins is the check that catches those problems before they’re built in.
What should a Brooklyn owner expect during flat roof construction days?
Expect the first day to look slower than it feels – deck inspection, material staging, and prep work are visible but not dramatic. Material deliveries typically need street or alley access, so a heads-up to neighbors on tight blocks is worth doing. The crew should be clear about which drains or water access points will be temporarily disrupted. By the time membrane goes down, the sequencing work is done – and that’s when visible progress moves fast. A final walkthrough before the crew leaves is standard; ask for it if it isn’t offered.
If you want flat roof construction services in Brooklyn explained in plain terms and built in the right order – drainage first, details done correctly, no shortcuts in the sequencing – call Dennis Roofing and let’s talk through your project before a single board goes down.