Expert Emergency Ceiling Repair Services in Brooklyn, NY
Did your ceiling just start leaking-or worse, sagging or collapsing-during a Brooklyn downpour? Here’s what you need to do in the next 10 minutes: First, move anyone out from under the affected area and shut off electricity to that room at the breaker. Second, place buckets or bins under active drips and document everything with photos. Third, call an emergency ceiling repair specialist who handles both the ceiling damage and the roof leak causing it-because fixing just the ceiling without addressing the source means you’ll be calling again in three months. Emergency ceiling repair in Brooklyn typically costs $850-$3,200 for immediate stabilization and temporary repairs, with full restoration ranging $2,400-$8,500 depending on ceiling size, material type, and extent of water damage.
I’m going to walk you through exactly what happens during a professional emergency ceiling repair response, what’s actually dangerous versus just cosmetic damage, and how we tackle the complete problem-from stopping the water at the roof to rebuilding your ceiling properly. After twelve years responding to ceiling emergencies across Brooklyn, I’ve learned that the homeowners who understand this process make better decisions under pressure and end up with better results.
What Makes a Ceiling Emergency Actually Dangerous
Most people can’t tell the difference between a ceiling that needs repair today and one that might collapse in the next hour. Here’s the reality: if you see sagging, bulging, or bowing-especially a visible “belly” forming in the ceiling material-that’s structural instability from water weight and you need to evacuate that space immediately. A typical sheetrock ceiling can hold about 15-20 pounds of absorbed water before the screws or nails pull loose. Plaster ceilings in prewar Brooklyn brownstones behave differently-the plaster itself is heavy, so when the wooden lath behind it gets soaked and starts failing, you get sudden detachment rather than gradual sagging.
I responded to a call in Park Slope last spring where a second-floor bedroom ceiling was “just dripping a little” according to the tenant. When I arrived, there was a three-foot section bowed down nearly four inches, with water pooling above creating a reservoir. We cleared the room, punctured the lowest point in a controlled way, drained about eight gallons of water into buckets, and removed the compromised section entirely. That ceiling was maybe twenty minutes from complete failure. The tenant didn’t realize that flat roofs-common on Brooklyn row houses-can develop ponding areas where water collects after heavy rain, and if there’s even a small penetration in the roof membrane, that pond becomes an indoor lake trapped above your ceiling.
Conversely, I’ve seen homeowners panic over brown staining and minor cracking that, while it definitely needs repair, isn’t an immediate safety risk. The difference comes down to water volume and structural attachment. Small, slow leaks-like from condensation in an HVAC line or a minor roof seam separation-cause discoloration and surface damage but rarely accumulate enough water weight to cause collapse. These still require emergency attention because they indicate active water intrusion and the longer water flows, the more secondary damage you get: mold growth, insulation saturation, electrical hazards.
The First Hour: Emergency Stabilization and Source Control
When I arrive at a ceiling emergency, the first fifteen minutes follow a specific sequence that prioritizes safety, then water control, then damage assessment. This isn’t about starting repairs-it’s about stopping things from getting worse and figuring out what we’re dealing with.
Step one is always electrical safety. Water and electricity create fatal combinations, so if there’s any water near light fixtures, ceiling fans, or you can see staining around electrical boxes, I verify power is off to that circuit. In older Brooklyn buildings-Bensonhurst, Sunset Park, many parts of Bed-Stuy-I often find knob-and-tube wiring or outdated electrical that makes this even more critical. If the homeowner hasn’t already killed the breaker, I do it immediately.
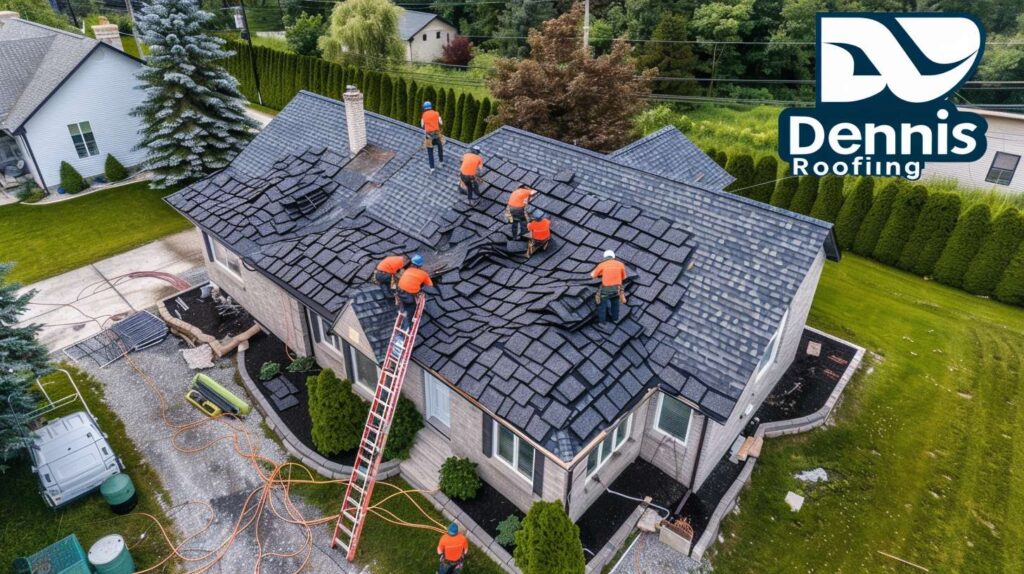
Step two is stopping or controlling active water. If it’s currently raining and water is actively coming in, I need to get on the roof and install emergency tarping or temporary patching. This is why emergency ceiling repair really needs to be handled by a roofing company that does both-a ceiling-only contractor will stabilize the interior but can’t address the source, meaning water keeps flowing while you wait for a separate roofer to arrive. At Dennis Roofing, we handle the complete emergency: roof access, temporary weatherproofing, and interior ceiling stabilization all in the same visit.
Once water flow is stopped or controlled, I assess whether the damaged ceiling section needs immediate removal. Sagging sections get removed right away-they’re hazards and they prevent proper drying. Stained but structurally sound sections stay in place temporarily while we dry everything out. I use moisture meters to check the ceiling material, insulation above, and surrounding framing. These readings tell me how far the water has traveled and whether we’re dealing with a localized problem or widespread saturation.
Here’s a typical example from Williamsburg last fall: townhouse owner called about a bedroom ceiling leak during an overnight storm. When I arrived at 6 AM, water was dripping from a light fixture and there was visible sagging in a two-by-three-foot area. I shut the bedroom circuit breaker, got on the roof, and found a failed flashing detail where the roof met a parapet wall-common failure point on Brooklyn row houses. I installed a temporary tarp secured with lumber and sandbags, came back inside, removed the sagging ceiling section (about six square feet once I cut back to solid material), set up a commercial dehumidifier and air mover, and had the immediate emergency contained within ninety minutes. The actual ceiling rebuild happened three days later after everything dried completely, but the crisis was over that morning.
Brooklyn Building Types and How Their Ceilings Fail
The type of building you’re in completely changes how ceiling emergencies develop and how we approach repairs. Brooklyn’s housing stock runs from 1890s brownstones to 1950s apartment buildings to 2010s condos, and they fail in different ways.
Prewar buildings with plaster ceilings (roughly pre-1950): These have plaster applied over wooden lath strips. When water intrusion happens, the lath swells and rots, losing its grip on the ceiling joists. The plaster itself can remain somewhat intact even as the attachment fails, which creates the dangerous situation where a heavy plaster section suddenly detaches and falls as one piece. These require careful assessment because small visible damage on the surface often masks larger hidden separation. I probe the ceiling around damaged areas to check how much has delaminated. Emergency repairs often mean removing larger sections than initially visible to get back to solidly attached material.
Postwar through 1980s buildings with sheetrock/drywall: These ceilings are more predictable. You get visible sagging before failure, and damage patterns clearly show how far water has spread (drywall wicks water outward from the leak point). The ceiling material itself is relatively inexpensive to replace-$45-$75 per 4×8 sheet installed in normal conditions-but emergency surcharges and the fact that we’re often working around furniture and belongings increases costs. The bigger issue is what’s above: many of these buildings have flat or very low-slope roofs that pond water, so ceiling leaks often indicate chronic roof problems requiring significant repair.
Modern condos and renovations (1990s-present): These typically have improved roof drainage and better waterproofing, so ceiling emergencies more often stem from plumbing failures (burst pipes, toilet overflows from units above) rather than roof leaks. The ceilings themselves are standard drywall, often with recessed lighting that creates penetration points where water appears. One advantage: these buildings usually have better documentation of building systems, making it easier to identify whether we’re dealing with a roof issue, HVAC condensate problem, or plumbing failure.
What Proper Drying Actually Involves
This is where I see the biggest gap between professional emergency ceiling repair and inadequate responses: understanding that visible water removal is just the beginning of the drying process. When ceiling materials get soaked, water saturates everything in layers-the ceiling surface, insulation above, structural framing, and often the walls where they meet the ceiling.
Proper commercial drying equipment makes an enormous difference. We use industrial dehumidifiers that pull 120+ pints of moisture per day-not the 35-pint homeowner units you get at hardware stores. We position multiple air movers (not just fans) to create airflow patterns that actually draw moisture out of building cavities. And we monitor moisture levels daily with calibrated meters, tracking the drying curve until readings return to normal.
Here’s what the timeline typically looks like: For moderate water damage-maybe eight to twelve square feet of ceiling affected, insulation soaked but framing not saturated-we’re looking at 3-5 days of drying with commercial equipment running continuously. Extensive damage with structural saturation can take 7-10 days. I know that sounds long and homeowners often want to rush into repairs, but here’s why we don’t: if you close up ceiling material over damp insulation and framing, you’re creating a perfect mold growth environment. Within two to three weeks, you’ll have mold colonies establishing in the concealed spaces. Then instead of a $2,800 ceiling repair, you’re looking at $6,500-$9,000 in mold remediation plus the ceiling work.
I had a situation in Bay Ridge where a landlord wanted us to “just patch it quick” after a roof leak soaked a rental unit ceiling. I explained we needed five days of drying first. He found another contractor who closed it up the next day. Four months later, the tenant reported a musty smell. The landlord ended up paying for professional mold testing, remediation that required removing the ceiling we’d warned him about, treatment of the framing, and a complete ceiling rebuild-all told about $8,200 instead of the $2,400 it would have cost to do it right the first time.
The Complete Repair: From Emergency Response to Finished Ceiling
Once everything is confirmed dry-and only then-we move into the rebuild phase. For most Brooklyn ceiling repairs, this means matching the existing ceiling material and finish to make the repair invisible.
With drywall ceilings, we’re installing new sheetrock, taping and mudding the joints and fasteners through typically three coats (base coat, second coat, final skim), sanding smooth, priming, and painting. The challenge is texture matching-many Brooklyn apartments have textured or “popcorn” ceilings, and matching existing texture requires experience. We keep texture material samples from different eras of Brooklyn construction to match what we’re working with.
Plaster ceiling repairs are more specialized. Small areas can be patched with modern plaster repair compounds. Larger sections often require replastering over new lath or, more commonly in emergency repairs where time matters, we install a drywall patch secured to the ceiling joists and then skim-coat it with plaster to match the surrounding finish. This hybrid approach gives you structural stability faster than traditional replastering while maintaining the appearance of the original plaster ceiling.
Paint matching is always the final challenge. Even if the homeowner knows the original paint color, ceilings age and change tone-especially around windows where UV exposure causes yellowing. We typically paint the entire ceiling rather than just the repair area to ensure consistent appearance. If budget is tight and the repair is in a corner or less visible area, we can sometimes get away with spot painting, but I’m always honest about the likelihood of visible color mismatch.
Cost Breakdown for Emergency Ceiling Repairs in Brooklyn
Let me give you realistic numbers based on what we actually charge for emergency ceiling work across Brooklyn neighborhoods:
| Service Component | Cost Range | Notes |
|---|---|---|
| Emergency Response Visit | $385-$575 | After-hours/weekend adds $125-$200; includes first 2 hours on-site |
| Temporary Roof Patching/Tarping | $275-$650 | Varies by roof access difficulty and area covered |
| Emergency Ceiling Stabilization | $450-$950 | Removing hazardous sections, initial drying setup |
| Commercial Drying Equipment (per day) | $125-$185 | Includes dehumidifier, air movers, daily monitoring |
| Ceiling Repair/Replacement (per 100 sq ft) | $850-$1,600 | Drywall replacement, taping, mudding, painting; plaster adds 20-35% |
| Insulation Replacement | $2.50-$4.25/sq ft | Required when insulation is saturated; includes removal and disposal |
| Permanent Roof Repair | $850-$3,200+ | Depends on cause; simple flashing repair vs. membrane replacement |
So for a typical emergency-let’s say a bedroom ceiling with about 60 square feet of damaged ceiling from a roof leak-you’re looking at: $475 emergency visit, $400 temporary roof protection, $550 emergency stabilization, $750 for five days of commercial drying (5 × $150), $950 ceiling repair including paint, $200 insulation replacement, and $1,200 for the permanent roof repair. Total: roughly $4,525. That’s with normal business-hours response; weekend emergencies add $150-$200, and overnight emergencies can add another $125-$175.
These numbers reflect Brooklyn pricing-we’re higher than suburban areas due to parking challenges, difficult building access (many buildings have no adjacent parking, we’re hauling equipment from street parking spaces), and higher overhead costs. But we’re also competitive with other legitimate Brooklyn emergency repair contractors. If you’re getting quotes significantly below these ranges, ask detailed questions about licensing, insurance, and what’s actually included.
Roof Issues That Cause Ceiling Emergencies
Since I started on the roofing side before specializing in emergency ceiling repairs, I approach every ceiling leak by identifying the roof problem causing it. Here are the most common culprits I find on Brooklyn roofs:
Failed flashing at parapet walls, chimneys, and roof penetrations. This is probably 40% of the ceiling emergencies I respond to. Brooklyn row houses have parapet walls (the short walls that extend above the roofline) all around the roof perimeter, and the flashing where the roof membrane meets these walls takes tremendous abuse. When it fails-either the sealant degrades, the metal corrodes through, or the membrane detaches-water runs down the interior side of the parapet and shows up as a ceiling leak in the top floor rooms. Permanent repair requires removing the failed flashing, properly preparing the substrate, and installing new flashing with the membrane correctly integrated.
Ponding water on flat or low-slope roofs. Brooklyn has thousands of flat-roof buildings, and truly flat roofs are engineering problems waiting to happen. They’re supposed to have at least 1/4 inch of slope per foot for drainage, but settlement, poor original construction, or added layers of roofing materials can create areas where water ponds. These ponds sit on the roof membrane for days after rain, and any small defect in the membrane-a tiny crack, a seam separation-becomes a slow leak that saturates everything above your ceiling. Permanent solution usually requires improving drainage (adding drains, creating slope with tapered insulation, or as a last resort, adding a drain in the ponding area).
Old, deteriorated roof membranes. Modified bitumen and built-up roofing systems (common on Brooklyn buildings from the 1970s-1990s) have service lives of 15-25 years. Once they’re past their lifespan, they become brittle, crack, and develop leaks that start small but expand rapidly. If your building is in this age range and you’re having ceiling leaks, the permanent solution is usually full roof replacement rather than ongoing patching. I know that’s not what people want to hear when they’re dealing with a ceiling emergency, but I’ve seen too many situations where landlords spend $3,000, then $2,800, then $3,500 on repeated ceiling repairs over two years when a $15,000 roof replacement would have solved everything.
When to Call for Emergency Help vs. Schedule Normal Repair
Not every ceiling leak requires an emergency response, and I’ll be straight with you about when it makes sense to pay emergency rates versus scheduling normal-hours service.
Call emergency services immediately if: You see sagging, bulging, or bowing in the ceiling material; water is actively pouring or flowing (not just dripping); water is coming from or near electrical fixtures; you see sudden large areas of new staining indicating rapid water intrusion; or it’s currently raining and water is actively entering.
Schedule normal service if: You have minor staining that appeared gradually over weeks; small areas of cracking or peeling from an old leak that’s no longer active; isolated drips that only happen during very heavy rain and stop shortly after; or damage from a one-time event (like a plumbing issue that’s been fixed) where the ceiling is stable and just needs cosmetic repair.
The difference matters financially. Emergency service includes premium charges for immediate response, after-hours availability, and rapid mobilization of equipment and crew. If your situation is genuinely urgent, it’s absolutely worth it-that premium cost prevents far greater damage. But if your ceiling is stable and the water source is controlled, scheduling repairs during normal business hours can save you $300-$500.
Here’s a real example of appropriate emergency vs. non-emergency timing: I got a call from a Prospect Heights homeowner on a Sunday morning about ceiling staining in her living room. She described brown staining about two feet across that she first noticed the day before. It wasn’t sagging, no active water, and it hadn’t rained in three days. I asked her to send photos, confirmed the ceiling was structurally sound based on the images, and scheduled a normal-hours visit for Tuesday morning. We saved her the weekend emergency premium ($175), found a minor roof issue that required a $450 repair plus $680 for the ceiling work, and she was very happy with the total cost of $1,130 versus what would have been close to $1,600 if we’d mobilized emergency service Sunday morning for a situation that wasn’t actually urgent.
Working with Insurance on Emergency Ceiling Repairs
Most homeowner’s insurance policies cover sudden and accidental water damage-a storm-related roof leak that causes ceiling damage typically qualifies. What they don’t cover is damage from lack of maintenance or gradual deterioration. This distinction matters enormously when you’re dealing with emergency ceiling repairs.
When I arrive at an emergency, I document everything with photos and detailed notes specifically formatted to support insurance claims: the extent of visible damage, likely cause (sudden storm event vs. chronic problem), emergency mitigation steps taken, and recommended repairs. This documentation package gives homeowners what they need to file claims effectively.
But here’s what I tell every homeowner: if your ceiling emergency stems from an old, deteriorated roof that’s been slowly failing, insurance probably won’t cover it. They’ll view it as a maintenance issue you should have addressed before it caused interior damage. If the roof failure was sudden-like wind damage during a storm lifting shingles or membrane, or a tree branch puncturing the roof-that’s covered. The gray area is roofs at the end of their service life that fail during a storm: insurance adjusters will argue you should have replaced the roof before it failed; homeowners argue the storm caused the specific failure. These claims often require negotiation.
We work with insurance adjusters regularly and can provide the documentation and explanation they need to process claims. What helps: maintenance records showing you’ve had the roof inspected regularly; evidence that the failure was sudden (like storm-related wind damage); and clear separation between emergency mitigation costs (usually covered) and deferred maintenance (usually not covered).
Why Dennis Roofing for Emergency Ceiling Repair in Brooklyn
When your ceiling is leaking or damaged, you need a contractor who handles the complete problem-not just patches the ceiling while ignoring the roof issue causing it. Dennis Roofing brings twelve years of emergency response experience across every Brooklyn neighborhood, with crews trained in both roofing and interior ceiling repair. We respond to emergencies typically within 90 minutes during business hours and within 2-3 hours for after-hours calls, and we arrive with the equipment and materials needed to stabilize both the roof and ceiling in a single visit.
We’re fully licensed and insured for both roofing and interior repair work in New York City, and we provide the detailed documentation homeowners need for insurance claims. Most importantly, we give you the straight assessment-when emergency repairs will solve your problem versus when you’re looking at larger roof issues that need addressing-so you can make informed decisions even in the stress of an emergency.
If you’re dealing with a ceiling emergency in Brooklyn right now, call us at Dennis Roofing. If it’s a less urgent situation, we’ll schedule you appropriately and save you the emergency premium. Either way, you’ll get the experienced, comprehensive response that actually solves the problem rather than just temporarily covering it up.