The delay that felt reasonable then costs more now. Four thousand dollars in early corrections can quietly become sixty thousand or more once a bad commercial roof installation is left to spread – and this article breaks down exactly where install mistakes begin, how they escalate through a building, and what to ask before hiring commercial roof installation services in Brooklyn, NY.
What Starts as a Small Correction Turns Into a Capital Problem
Four thousand dollars is a painful invoice; sixty thousand is a budget meeting. A parapet termination done sloppy, or a seam that wasn’t properly welded at the edge – that’s a correction you could have handled for somewhere around $4,000 if it was caught early. Leave it, and the water finds the insulation. The insulation holds it. The deck softens. Now you’re tearing off sections, drying the substrate, replacing insulation boards, patching interior ceilings, and scheduling around tenants who are losing their minds. That same corner of the roof – that’s where the dollars changed direction – and the invoice that lands at the end looks nothing like the one you could have paid in the first six months.
Here’s my opinion after too many Brooklyn callbacks: bad installation is more expensive than bad weather. Weather is unpredictable. Installation quality is a choice that was made before the first rain came. As Danny Kowalski, a project manager with Dennis Roofing who’s spent 17 years catching failure points at drains, parapets, and wall intersections, I can tell you that the buildings that give owners the worst surprises aren’t the old ones with deferred maintenance – they’re the ones where someone paid for a roof and assumed the work was correct. The seam at the low parapet on a flat commercial roof isn’t a finishing detail. It’s where the dollars changed direction the moment it was left loose.
Water travels. It enters at a failed seam or flashing, moves laterally through insulation, and can saturate a significant area before a single ceiling stain appears. Insulation can hold moisture for weeks or months – losing R-value, accelerating deck deterioration – without triggering any visible interior sign. Owners who scope repairs based only on what they can see inside are almost always pricing the smallest part of the problem.
Where Install Crews Usually Get Beat by the Details
Drainage and Slope Mistakes
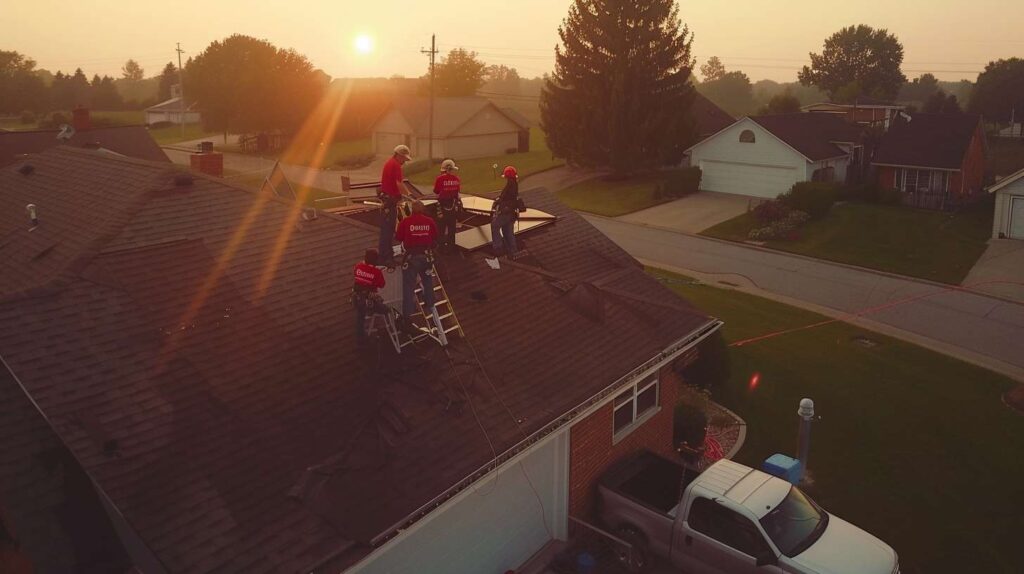
If I asked you where water sits after a storm, could your roofer answer without guessing? I was on a flat roof in Sunset Park at 6:40 in the morning in late February – steam still coming off the vents, sun barely up – and the property manager kept insisting the roof was “basically new.” He wasn’t wrong about the age. But the membrane had been run sloppy at the parapet, just kind of tucked instead of properly terminated, and the first real freeze-thaw cycle had already done its work. He was thinking small repair. By the end of that week, he was looking at tear-off sections, wet insulation pulled out in chunks, and interior damage in two tenant spaces. Brooklyn’s flat commercial roofs sit on older masonry buildings where the parapet walls shift seasonally, the drain placement was often determined decades ago, and the drainage behavior can change block to block depending on how a building was modified. On some of the older commercial strips – think Fulton Street, Flatbush Avenue, any of the warehouse blocks near the BQE – you get roofs that drain toward a parapet rather than away from it because a previous tenant built up the interior floor. A crew that doesn’t read that condition before they lay anything down is already setting up the next callback.
Water doesn’t need a dramatic opening; it needs one lazy detail.
Perimeter and Penetration Failures
| Detail Installed Wrong | What You Notice First | What’s Probably Happening Underneath | Cost Consequence If Ignored |
|---|---|---|---|
| Drain bowl set too high or low | Chronic ponding that doesn’t clear within 48 hours | Membrane stress, insulation saturation around bowl, compression failure | $6,000 – $18,000 to re-set drain, replace saturated insulation, patch membrane |
| Loose or poorly welded seams | Fishmouths or visible edge lift at seam lines | Water tracking laterally under membrane, insulation wetting, deck exposure | $4,500 – $20,000+ depending on spread; full seam rescan recommended |
| Parapet termination done sloppy | Membrane pulling away from wall; possible efflorescence on masonry | Freeze-thaw cycling opening termination, water entering at wall base, decking damage | $8,000 – $25,000 once wall assembly is involved |
| Edge metal fastener pattern wrong | Edge metal visibly wavy or partially lifted after wind events | Membrane pulling back from perimeter, concentrated water entry at edge | $5,000 – $15,000; can escalate quickly if membrane detaches in wind |
| Penetration flashing rushed | Repeat leaks at HVAC curbs, pipes, or skylights only during heavy rain | Gaps between boot and membrane, inadequate height on flashing, trapped water at curb base | $3,000 – $12,000 per penetration area; multiplies with unit count |
| Insulation installed over trapped moisture | Odors inside building; humidity complaints; soft spots on roof surface | Mold development, R-value collapse, deck corrosion or rot beneath boards | $15,000 – $50,000+ if deck is compromised; full section replacement likely |
-
🔴
Ponding water still present 48 hours after rain – not a drainage quirk; a slope or drain installation problem that is loading your insulation right now. -
🔴
Fishmouths or open seam edges – a seam that wasn’t heat-welded properly or walked before it cooled. Water does not need a large opening to get under a membrane. -
🔴
Wrinkling or bubbling at wall transitions – membrane that wasn’t allowed to relax before installation or wasn’t properly adhered at the base of the parapet. -
🔴
Edge metal that moves or flexes underfoot – fastener pattern was wrong or fasteners missed the substrate. Once edge metal lifts, the membrane perimeter is unprotected. -
🔴
Repeat leaks at the same penetration – HVAC curbs, pipes, and vents that keep leaking at the same point after each repair are telling you the original flashing was never correct. -
🔴
Odors or unusual humidity complaints from tenants below – often the first real sign of trapped moisture in the insulation layer, long before any visible stain or drip appears inside.
Cheap Bids Usually Hide the Expensive Part
Blunt truth: a commercial roof can look finished and still be installed wrong. I got a call one humid July afternoon in Bushwick on a warehouse job where the owner had gone with the cheapest install bid – saved himself somewhere around $14,000 upfront. By the time I arrived, there were odors coming up through the space and dripping over rows of boxed inventory. The crew had trapped moisture under the system before laying the insulation, and the flashing around the penetrations looked like it had been done by someone watching the clock. Damaged stock. Disrupted shipping schedule for two weeks. And a repair and replacement bill that made the original savings look irrelevant. Here’s the insider tip worth writing down: low bids often leave out substrate prep, moisture testing, manufacturer-required detail labor, and documented closeout photos. Don’t ask what the bid includes. Ask what it excludes – and get that answer in writing.
I remember one roof on 3rd Avenue where the leak wasn’t the problem – the false confidence was. The owner had a completed project, a paid invoice, and no reason to look twice. The membrane looked clean from the street level, and nobody climbed up until a tenant called about a ceiling tile. A low bid can buy appearance without performance, and the gap between those two things is exactly where the loss accumulates. And that’s the part people don’t price in.
| Myth | Fact |
|---|---|
| “New means protected.” | New means materials were installed – not that they were installed correctly. Installation quality determines protection, not the invoice date. |
| “If it isn’t leaking inside, it’s fine.” | Insulation can be saturated for months before water migrates through to an interior surface. No stain does not mean no damage. |
| “Warranty fixes installation quality.” | Manufacturer warranties cover material defects, not bad workmanship. An incorrectly installed system can void the warranty entirely before the first winter. |
| “All commercial bids include the same scope.” | They don’t. Substrate prep, moisture testing, detail labor at penetrations, and closeout documentation are routinely left out of low bids. Line items matter. |
| “A few ponding spots are normal on every roof.” | Temporary ponding during a storm is normal. Ponding that persists 48 hours after rain stops is a drainage failure and an insulation-loading problem that compounds over time. |
Failures Spread Faster Than Most Owners Think
How One Bad Edge Detail Starts a Chain Reaction
A roof system is like a row of dominoes on a loading dock – once one edge detail is wrong, the rest start falling in order. I was on a school building in Bay Ridge right after a windy spring storm, talking to a facilities manager who told me flat out, “We just replaced this roof three years ago.” You could see the fastener pattern problems and the edge metal done wrong without even squinting – the kind of visible errors that shouldn’t survive a proper quality check. By noon, we had photos showing clearly that the failure wasn’t age, wasn’t the storm. It was installation. Now follow that mistake one step further: that edge metal wasn’t just cosmetically wrong. It was functionally wrong, which means the next windy storm was always going to exploit it.
Here’s how it moves through a building: the edge detail fails, the membrane starts lifting at the perimeter, water finds the gap during the next rain event, it moves under the membrane into the insulation, the insulation holds it, thermal performance drops, the deck starts to degrade unseen, and eventually – weeks or months later – the damage shows up inside where tenants are working or inventory is sitting. In a Brooklyn commercial building that’s housing a school, a warehouse operation, or a mixed-use property with multiple tenants, every step in that chain multiplies the cost. The building doesn’t stop functioning while the roof quietly fails. That’s what makes it expensive.
A seam, drain, edge metal, or flashing at a parapet or penetration is installed outside manufacturer spec or without proper preparation. No visible sign yet.
The first significant weather event – wind, heavy rain, freeze-thaw cycle – finds the gap. The weak detail doesn’t hold because it was never correctly made.
Water tracks laterally – often far from the original entry point. Insulation boards absorb and hold it. No interior sign yet, but the damage clock is running.
Wet insulation loses R-value. The deck beneath begins to degrade. The affected area grows larger than what any surface inspection would show. Energy costs may begin rising.
Ceiling stains, dripping, humidity complaints, or odors appear. Tenants call. Operations are disrupted. Inventory or equipment may already be at risk or damaged.
The saturation area is too large to patch economically. What started as a $4,000 correction is now a partial or full tear-off, a budget meeting, and a scheduling problem.
Questions to Ask Before You Sign Another Roofing Contract
Can the contractor explain where water will move on your roof without climbing down into guesswork? A competent commercial roof installation conversation should cover the slope and drain path before materials are ever mentioned – where water moves, where it collects, and what the attachment method is given the existing deck condition. Moisture verification isn’t optional when there’s an existing system involved. Every penetration, parapet, and wall intersection needs to be in the detail scope by name, not implied. And you’ll want a clear answer on who is accountable if site conditions differ from what the bid assumed – because in older Brooklyn commercial buildings, they often do. Get the documentation process confirmed in writing: closeout photos, manufacturer warranty filing, and the name of the person responsible if something needs to come back.